In case you haven’t heard, maker culture is here, it is awesome, and it is an integral part of the future of libraries (don’t believe me? Read this).
Over the past 6 months or so a colleague and I have introduced a maker program for kids at our library called. We choose science, technology, and art activities that are self-directed, allowing the children to use their imagination and inventive skills. We’ve done everything from making musical stairs and game controllers out of MaKey MaKey, to making boats out of recycled material and then having a contest to see which boat can float the most potatoes, to creating stamps for making prints, to making and launching foam rockets.
This past Wednesday we experimented with squishy circuits. Squishy Circuits is a project that came out of the Thomas Lab at St. Thomas University’s School of Engineering (watch the TED Talk here) with the goal of exposing children to electricity, physics, and engineering in a fun and interactive way – with LEDs, toy motors and buzzers, and dough!

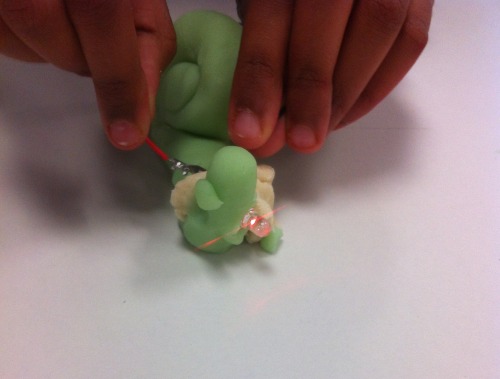
A Creeper from Minecraft with a glowing heart (LED covered in conductive dough) created by one of our kids.
I had to adapt the Squishy Circuits program to our library’s environment. Our demographics are such that we get a lot of younger children as opposed to adolescents and teens, many of whom struggle in school for reasons as varied as socio-economics and being newcomers to Canada. Socio-economics is also why many of the kids in our neighbourhood are not familiar with electronics and technology. Hence I needed to keep our Squishy Circuits program simple and be sure I gave them a little bit of preamble on the basics of circuits, and show them a couple of examples of squishy circuits I made in advance. Though many people involved in maker culture will tell you this goes against the investigative spirit of maker culture and its focus on learning through doing and learning from failure, I can tell you that if I didn’t do this the kids wouldn’t have had the slightest idea what to do and therefore had no starting point from which to start experimenting – they would just leave in frustration. It has happened before. Through trial and error I found that once I do this preamble, they get it and are fully willing and able to experiment and explore on their own. They might need a little more coaching and/or reminding here and there of the science or concept behind what we are doing, but by the end they usually all get it.
So, without further adieu, here is my program outline as a pdf:
It covers the teaching method I used in order to communicate to the kids the concepts necessary to understanding how to make use of the dough and electronics. It also talks about safety concerns and the materials you’ll need. Below I go over how to find and assemble the electronic components if it’s not something you are familiar with (how to know which battery packs to get, what voltage should the LEDs and motors require, how to solder, etc.). Unfortunately the Squishy Circuits website doesn’t cover this. But believe me, the materials are all readily available and no great knowledge of electricity and electronics is required. This whole tutorial is also available on Instructables.

These battery packs, toy motors, and LED lights I bought at an electronics hobby store because I found them there at the best price (budgets are always a concern for libraries!) however if you take apart many toys and gadgets, you’ll find these items inside.
If you find you have bare wire ends like this
 or this
then you will need to solder terminals on. Terminals can be bought very cheaply at hobby and electronics stores, or online. I used fork shaped ones like this

but really, you could use spade or circle shapes too. It doesn’t matter. I like the ones with an end that is meant to be crimped to the wire with needle nose pliers or a wire crimper (see photo). It just makes the soldering part easier because the terminal will be kept somewhat in place. Heck, if you are really good and the terminal holds on its own after crimping, you might not even need to solder. But, if you have super steady hands, or a second set of hands to help you, then go ahead and try the flat end ones! Just don’t buy terminals with a plastic end. You will have nothing to solder to!
A soldering iron and solder can be bought at an hobby/electronics store, or a hardware store. A cheap soldering iron will do the job just fine, and any solder is good as long as it is not a super thick gauge and it is not acid flux. No clean is ideal, and lead-free is not, but these are not hard-and-fast rules.
I promise that soldering is not that difficult. In fact, it’s a lot of fun. Here is a great tutorial.
A quick note: if you find you have some sort of specific end to a battery pack, like the one below, you can still use it. You will just need a wire stripper/crimper to cut the end off and strip back some of the black and red coating to reveal the wire in order to be able to solder it to a terminal.

In terms of what kind of battery pack to get, it is actually not a huge deal. 4 x AA is ideal, but we were able to get 2 x AAA to work, though the battery wires had to be placed very close to motor or LED light within the dough in order to work. Also, the lower the volt requirement for the LEDs and motors, the easier they will be to make run.
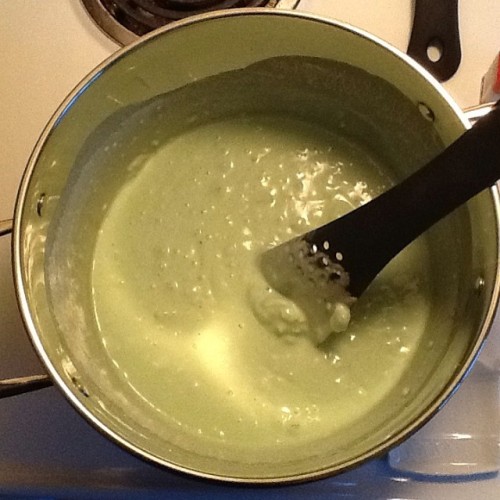
The dough instructions are of course very simple. Just follow the directions on the Squishy Circuits website.
Et voilà!
That’s it, now you can get makin’ :