Old stuff

I loves it.

I nerded out pretty hardcore when I saw that the decor theme at this restaurant was all vintage knitting and sewing stuff.

And at a used bookstore I recently acquired these:


Early American Weaving and Dyeing by J. & R. Bronson was first published in 1817. It discusses how to weave 35 designs and includes 41 dyeing recipes and tips. There is detailed coverage of wool processing, calculating thread, carding and spinning, loom operation, more.

Here are some excerpts:

Needlework as Art by Lady M. Alford is rather self explanatory. It explores the history of needlearts around the world.

Excerpts:

Remember, all of this would have been done by HAND. It blows the mind. This is why I love textiles: it’s history you can hold and use.

Another cool find recently has been a flea market with a large collection of antique crochet. Did you know that all crochet is done by hand? Machines can’t duplicate it like they can with knitting. You can have faux lace made on a machine, but it is just fibres crimped and pressed together cheaply, or in some places acrylic/plastic (shudder), but it will never be true crochet like these beauties:


I included the cake lifter in that last shot because it’s petit point themed. How awesome is that.

Knitter’s Frolic

So this past weekend was the annual Knitter’s Frolic. I went with some members of my knitting group, and we had a lot of fun.

  Above photos from CanadianChia.

And saw some amazing things.

  CASHMERE ROVING. IT FEELS LIKE CLOUDS.

And when it comes to shopping, I made out like a bandit this year. A bandit who pays for all their loot, but a bandit nonetheless.

Everything there was just SO AWESOME this year. More awesome than it already normally is. Plus I got more back that I thought I would with my tax return, so happy early birthday to me.

Here is the pile, in all its glory:

IMG_0533

And now for the breakdown, minus the Addi Turbos and the Indigodragonfly project bag with the hilarious print.

First we have some beautiful lace weight. Seriously, the picture does not do the emerald tones of this skein justice. It’s Shalimar Yarn‘s Breathless Lace in Loden. Handpainted! 850 yds! $30! 😀

I plan on making this beauty with it.

Then I stopped by a family-owned farm‘s stall and grabbed me some more hand painted goodness:

Once again, my camera does not do the deep hues of this yellow any justice. I normally don’t go for yellows, but it was so gorgeous it had to come home with me.

The Black Lamb (another local yarn producer) had this at their booth:

Merino mixed with angora rabbit! Get in my shopping bag now please!

Then at the booth for Gateway Fibreworks (another local outfit that makes yarn from Ontario alpacas – noticing a “local” theme yet?) I saw this skein, the last one they had of it’s colourful yet undyed (these are natural alpaca fleece colours) kind and had to have it.

While I was there I grabbed these mini skeins because alpaca mini skeins.

I’m thinking it should be enough for fingerless gloves.

So that’s it for the local fibres. I had planned on buying only local, normally-hard-to-get-your-hands-on stuff, but then…

Classic Elite Yarns Provence on sale for 30% off at EweKnit‘s booth.

Since I needed some DK weight cotton for this vest, I figured I might as well buy it while it’s on sale.

This Habu skein was also 50% off at Unraveled. I’ve always wanted to try Habu (the ones that brought you yarns made from paper, steel, and etc) and at this price for a little skein I figured why not?

It’s called Kibiso silk. It may not look very silky, but that’s because it is actually made from the waste silk, which is the fuzzy bits on the surface one gets when you reel silk from a cocoon.

And last, but not least, we have this skein from Skein (har har). When I saw it at Shall We Knit‘s booth, I had to have it. It’s just so different. The colourway is Tuscany.

I also got a good deal on hand carders from Gemini Fibres. I’ll need them if I ever actually start spinning.

Speaking of starting spinning, I’ve taken a step in the right direction! I took Barb Aikman’s class on the Sunday of the Frolic.

I’ve got a long way to go, but at least it’s a start. I had trouble with the single treadle I was using, so a fellow student was kind enough to let me try her Ashford Joy2. Muuuuch better.

…aaand now I want an Ashford Joy2. It’s a beautiful machine.

But, before I can think of that, or use all this new yarn that is burning a hole in my stash, I must finish the baby knitting (yes, there is still another set of these:

as well as a blanket to go) plus the shawl I’ve started for myself:

I think I needed to finally make something for myself. People are starting to ask why I knit so much but hardly wear any knitwear :S

Luckily this shawl is in worsted weight, so hopefully it won’t take too long.

The baby knitting never ends…

…but dear God it’s cute stuff.

Finished these recently:

and just started the foundation for these cuties:

After that I will be casting on for Knitted Moon Design’s Star Path Baby Blanket:

Other things I’ve been working on:

A coworker and fellow knitter is retiring, so I made her this little keychain pouch and put some fancy stitch markers in it. Pattern is here.

This cute owl coffee cup cozy (pattern is here) was the pattern in a knit-a-long I joined, aptly named the Cabled Owl Cozy KAL. The pattern writer/group admin (Knitphomaniac over on Blogger) was selling the sew-on googly eyes with proceeds going to a local soup kitchen in time for Easter. I opted to gift the FO to my mom, who is a little down lately now that she’s an empty-nester, my grandma has cancer, and my grandpa has had to move into a nursing home.

Grandma asked me to make her a hat for her new bald ‘do. I happily obliged. 1) grandma asked and I love her, 2) knitting is a good stress reliever for me, 3) my grandma is the one who taught me to knit in the first place.

I opted for the sophisticated Lucy Hat by Carina Spencer.

Grandma quickly noticed that her noggin was getting cold anytime she needed to take off the hat to wash it, and so I just finished up a second hat for her – a Tam-o’-Shanter made using Elizabeth Zimmermann’s instructions in Knitting Without Tears.

I’ve been told several times lately that I should start an Etsy store. I was wondering why, and had thought “hey, maybe I’m getting so good people are noticing!” but after writing this post I think it’s more likely because I’ve been churning out so .much lately. Unfortunately I don’t know when I’ll have time to knit for people that aren’t family or babies :S Maybe this summer? We shall see…

Slipper sole tutorial

As mentioned in my last post, I’ve been working on making a pair of slippers for my husband in colours from Fallout, his favourite video game. It’s been a huge undertaking, since I couldn’t find any patterns that were the style he wanted that went up to size 13. The closest I could find was this pattern, which I’ve had to heavily modify. On top of all this, he wanted a hard sole. Geeze, the demands of those who don’t craft and have no idea how complicated the thing that they are asking for is.

Well… I’m proud to say I’m finally done! The pattern to follow soon.

In the meantime, I thought I would share how I made the soles. I also put the tutorial up on Instructables, where you can download it as a pdf.

Supplies:

  • patterned/textured PVC fabric (available at most large fabric stores)
  • craft foam
  • fabric on the thicker side (cotton is suggested, I used an old pair of jeans)
  • cardboard
  • pen
  • quality large scissors (you will be cutting through the PVC)
  • Shoe Goo
  • popsicle stick or other instrument for spreading glue that you are prepared to not get back

Step 1:

Make a template by tracing the outline of the person’s foot using the cardboard and pen. Compare it to the bottom of the actual slipper and make any necessary adjustments. Cut out your finished template and use it to cut out four pieces of craft foam, two pieces of PVC fabric, and two pieces of regular fabric. Pay attention to right vs. left soles as you do this.

Step 2:

Essentially you are making a sandwich of PVC on the bottom (with the PVC side outwards so that it will be the very bottom of the sole, the part that makes contact with the ground), two layers of foam, and then the fabric layer on top. Between each layer is a liberally applied coat of Shoe Goo.

I suppose other glues are possible, but I highly recommend Shoe Goo. It is designed specifically for shoes in that when it dries it is clear, solid and non-tacky, but still has some flexibility. Plus the hold is superior. Nothing is going to get your layers apart. It is not easy to work with however as it sticks to everything in its wet state. This is why I recommend using a popsicle stick to spread it. However I ultimately still ended up using my fingers at some points, so be sure to have a good hand cleaner present. Something like Fast Orange is ideal, but I got by with a dish scrubber and some dish soap.

Step 3:

Give the sole a full 48 hours to dry and cure. That was a lot of glue, after all. Then you can finally add the last layer – the slipper itself! Make sure you give it about 24 hours to dry and cure.

Ta-da!

Excitement

Now that the mittens from my last post are done, I’ve finally had time to work on my wedding shrug prototype (originally mentioned here).

Aaaaand *drum roll*

Ta-da!

Now to start it in white!

… and then take it to where my dress is beings stored to make sure the colour matches. Man, getting married is a lot of work.

Speaking of the wedding, I also need to start making some prototype flowers. My fiancé and I have decided we’d like to have homemade flowers at our wedding. I originally got the idea when I was first looking at knitted possibilities back when we first got engaged, and he agrees that it would be a nice, personal, (and inexpensive!) touch, and very “me.”

One idea:

Bunch of other ideas:

crafted bouquet

Patterns I’m leaning towards:

Crochet version

Knit version. However, I like the leaves and stems from here better.

Another knit version that I really like for the corsages and boutineers, simply because it is flatter.

And, since I’ll need about 50 flowers, I’m very lucky to have awesome knitting friends who have said they’ll help 😀

Noodle

I came into work the other day to find this little gem on my desk.

Isn’t she cute?! She’s from the book Noodle’s Knitting by Sheryl Webster, illustrated by Caroline Pedler.

A coworker from another branch (the same lovely individual who made this) made her for a knitting and fiction themed craft program and, knowing I love the book and have used it in storytimes more than once, made a second one for me.

I was so touched! Not to mention thrilled to be able to put something this adorable on my mantle. Right now she’s sitting beside my TARDIS, a product of the Ravhellenic Games. Mine is definitely the home of a nerdy knitter.

Speaking of knitting themed picture books, I don’t believe I’ve shared this other favourite of mine yet (hard to believe since I’ve written about them here and here):

Extra Yarn by Mac Barnett, illustrated by Jon Klassen.

These two images from the book pretty much sum up how awesome it is (though there is a great review here if you need more convincing):

I am not a crocheter

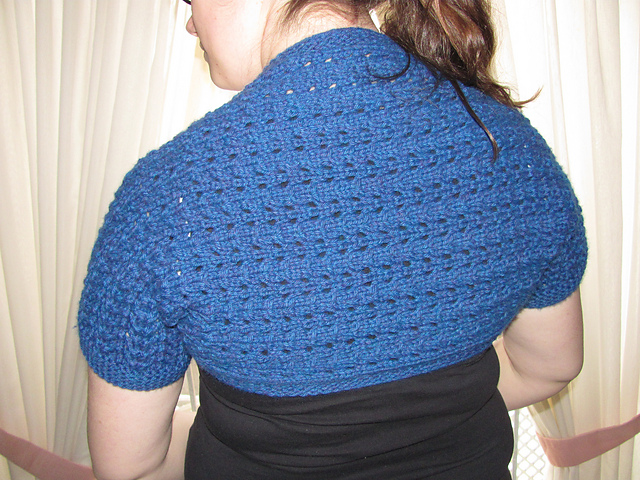
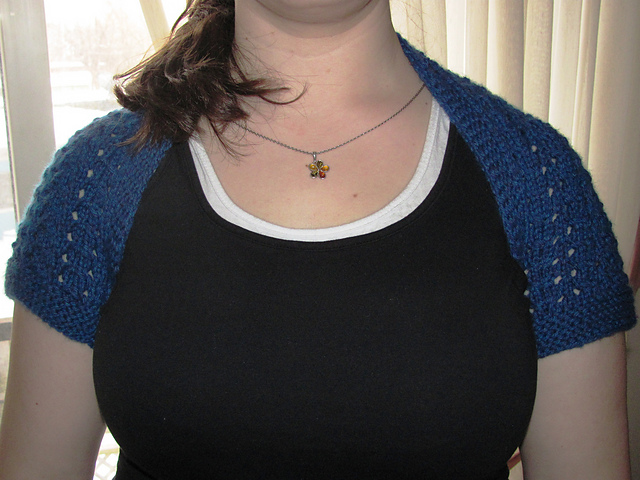
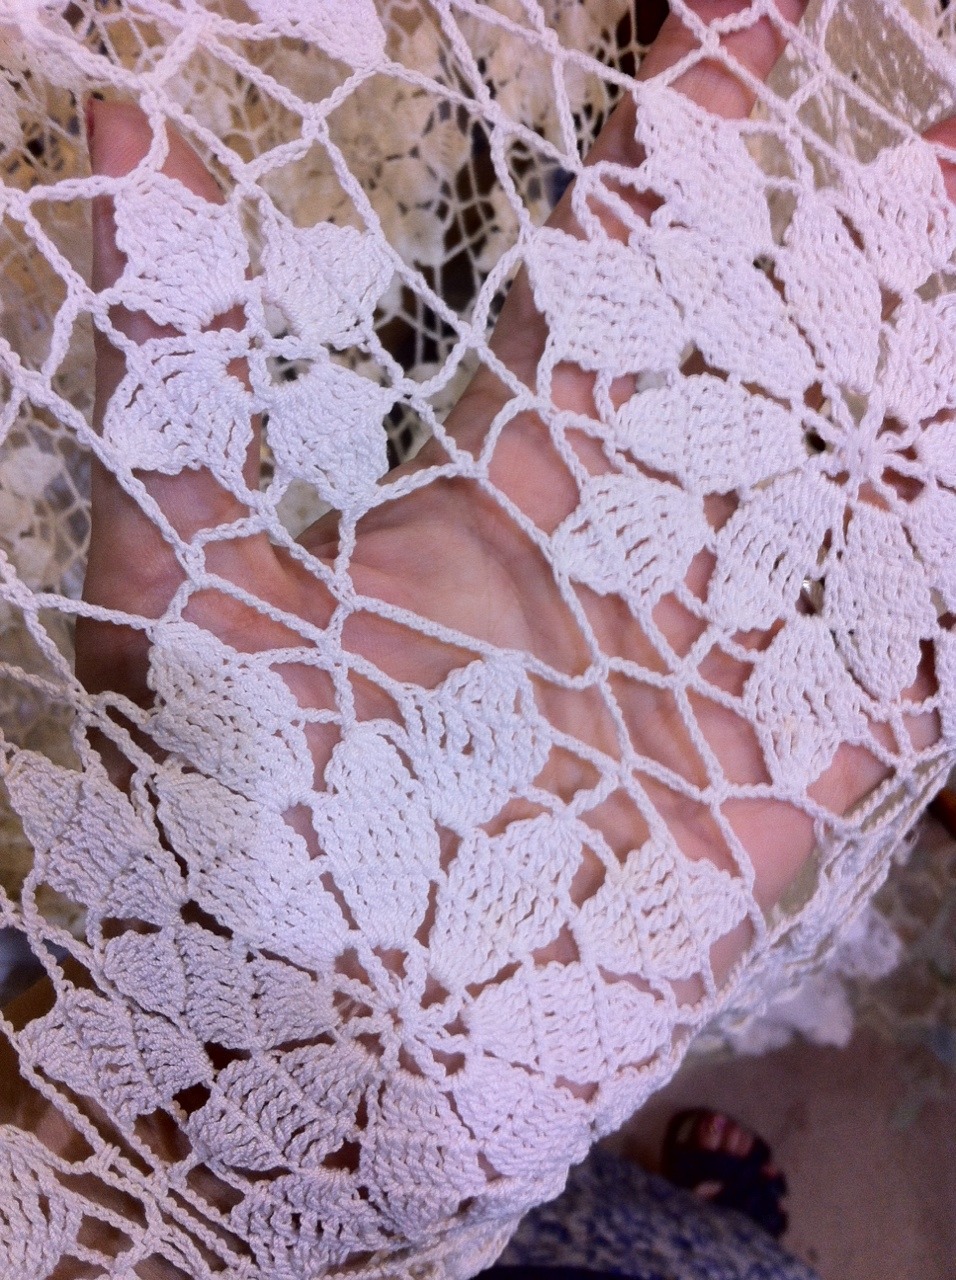
As you may remember from my last (real) post that I recently finished my fingerless mittens, using Julia V’s pattern:

While I am enjoying them (aran weight merino is lovely warm and soft, though sadly the brand I used no longer exists) I recently had the revelation that I don’t think I entirely enjoyed making them.

How can this be?!

The problem, I believe, lies in the fact that a) they were crocheted, and b) my answer to the age old “are you a process or a product knitter?” question is that I am a process knitter. How are these two things related? And how did I come to these conclusions? Let me explain:

These fingerless mittens took much less time to whip up than the last pair I made, which seemed to prove the oft-heard adage that crocheting is faster than knitting. So, when my brother asked for a pair of convertible gloves, I immediately searched for crochet versions on Ravelry.

I even went so far as to narrow it down to Sue Norrad’s Crocheted Mittens / Fingerless Gloves

Yet when it came time to start the foundation chain (like casting on for you knitting-only folk) I felt something I had never felt before: reluctance. I did not want to start the bloody thing, regardless of how much I admired the pattern and liked the idea of getting the mittens made quickly. For a brief moment, this made me fear I was loosing interest in a hobby that has been such a focal point in my life, but as I thought about it some more, I realized my problem was that I did not want to start another crochet project so soon. My hands were missing their beloved needles. I think there is something in the process of knitting, in holding a needle in each hand and working with them in tandem that I crave. Indeed, as I performed the same Ravelry search for knitted convertible mittens, I felt noticeably happier.

So, I learned some things today:

1) though I thought I didn’t have a preference when it came to knit vs. crochet, it would seem I do, and 2) despite the fact that I had assumed I was a product knitter since I like the feeling of completing a project, it looks like it may actually be the process I am infatuated with (let’s be frank, at this point my love of yarn is an infatuation).

(However, I have to say that I am a little adverse to lumping people into two tight categories. I may enjoy the process, but I’ll be damned if I don’t also enjoy getting the product at the end of it.)

So, are you curious as to what pattern I ended up with?

At first I thought I had narrowed it down to Glenna C.‘s Podster Gloves pattern

but I thought “the maximum size given is a men’s small. My brother most definitely does not wear size small” and “I’m really not feeling the each-finger-has-a-hole thing. That took a lot of time last year, and I still have a lot of holiday knitting to do. Plus the last thing I need is another part of the mittens that might not fit my brother’s massive fingers.”

Finally I stumbled across Lauren Perruzza’s appropriately titled Manly-Man Man Mittens.

Perfect! Albeit, Lauren claims the pattern is a work-in-progress so some directions may be difficult to decipher. But she’s open to helping, the size is already set to ‘men’s large’ and there are no finicky finger holes outside of the thumbs. I can work with this.

The only thing missing is the awesomeness that is the ‘podster’ thumb from Glenna’s pattern. I’m thinking of trying to incorporate it. I’ll let you know how it goes.

Mine are coming along nicely, having just cast on:

I’ve been using the Lion Brand Fishermen’s Wool I got on sale last year. Relatively inexpensive real virgin wool with the lanolin still in. I forgot how much I love wool like this. Plus it’s perfect for my outdoors-loving brother who is known for being rather hard on clothing.

Needless to say, I’m back from my post crocheted fingerless mitten slump 🙂

The bad side to this new mitten project, however, is that my Hitckhiker shawl, which I was all excited about starting in my last post, is going to be stuck at the 25th row mark for a while..

What might cause it to languish even longer is the fact that The DROPS Advent Calendar has come out. Thanks to katknit for pointing this out. Free pattern every day, yes please.

Here’s the cute mini stockings for Dec 1:

http://www.garnstudio.com/lang/us/pattern.php?id=5903&lang=us

One last thing to share before I go:

Believe it or not, this isn’t just another picture of my cat (though I love any opportunity to post one, let’s be honest). The focus here is on the yarn and needles (or the end of one of them anyway)

The yarn isn’t super sexy, I know. And straight needles are kind of out-or-character for me. I’m using them to practice a new knitting technique! Lever knitting.

Last Saturday I took a class taught by Stephanie Pearl-McPhee (aka the Yarn Harlot) on Knitting for Speed and Efficiency at Unwind Yarn House, where she taught us this technique. We’re supposed to practice it for 30 days (a little per day, as much as we can stand it). Apparently that’s about how long it takes to master a new way of knitting. I can believe it, since my stitches are not at all uniform and are ridiculously tight, which has brought back buried childhood memories. Yet slowly, day by day, I’m getting there. Just like when I was nine 🙂

Felicia Lo of SweetGeorgia Yarns has a great summary of the Stephanie’s explanation of the differences between lever (aka Irish cottage), throwing (aka English), and picking (aka Continental, though Americans like to call it American) and how they came to be. She also has links to Youtube videos of Stephanie lever knitting, though FYI Stephanie herself advises to watch sans sound/commentary.