Other things I’ve been working on include learning to spin and improving my sewing skills.
The onesie I sewed also includes an iron-on transfer vinyl design that I made using my Cricut machine. As you can tell, it was for a fellow librarian co-worker’s baby 😉
I’ve also been using the Cricut to make cards.
It’s been a creative 7 months or so! And here I was lamenting that I hadn’t “accomplished anything last year.” Sometimes you just need to slow down and remember 🙂
I’m so thrilled to have been able to help out my friend Joanna with Yarn Crush, and grateful that she believed in my crochet skills enough to publish my first patterns. I can’t wait to do more! Yet perhaps even more exciting is that I’ve started helping her tackle submissions from other designers, am tech editing patterns, and am helping expand Yarn Crush‘s social media presence. We already have knit and crochet designers lined up for the next year! I know what some of them are working on (can’t tell! Each box is a surprise!) and the yarns (also a surpirse!) they will be using and am super stoked 😀
I’ve designed a fewthings, but I’m hitting a big milestone now: my first professionally written, published pattern is releasing soon!
It’s part of Yarn Crush‘s November 2015 Box, shipping this week.
Here’s a sneak peak (I can’t reveal the whole thing yet, Yarn Crush IS a mystery subscription box, after all)
Can’t wait! Yarn Crush is a new subscription box that’s gaining a lot of momentum. I’m honoured to be involved. Check out some great reviews here and here. The Ravelry group is quite active too.
You can still place an order on a November box for the next day or two. They ship out Monday! Here is a coupon code for 15% off the first month of a regular monthly or bimonthly plan: HELLO
Being a knitter and a fan of Twin Peaks, I was excited to hear that Teresa Gregorio and Leah Coccari-Swift were writing a book of patterns based on the show. Twin Peaks is known for its many, many sweaters. One fan counted as many as 118! It’s therefore surprising that Teresa and Leah are the first knitwear designers to pursue a Twin Peaks project. However, it’s ideal that they are going to be the ones to do it, since both designers’ aesthetics are well-suited to Twin Peaks. They are not afraid to experiment and tackle the odd and unique, which results in interesting designs that are not run-of-the-mill. All qualities that also describe Twin Peaks.
Both designers are also clearly knowledgeable when it comes to fashion, culture, and history, which is reflected in their work. This is ideal, since Twin Peaks is very much steeped in time and place, albeit one that is not far removed from our own. Masterful clothing and set design is what signals the subtle shift in time and place to the viewer effectively. It’s part of what I love about the show, and these ladies have recreated the feel of Twin Peaks perfectly. While none of the patterns in the book are going to be slavish reproductions of specific sweaters seen on the show, it is evident that Teresa and Leah have done their research and are true fans. Just check out these obvious sources of inspiration.
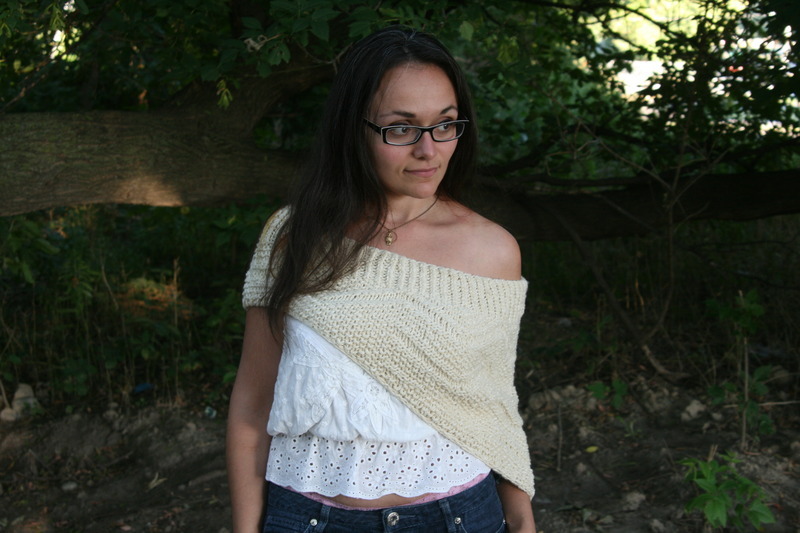
The Last Evening wrap channels some early Maddy.
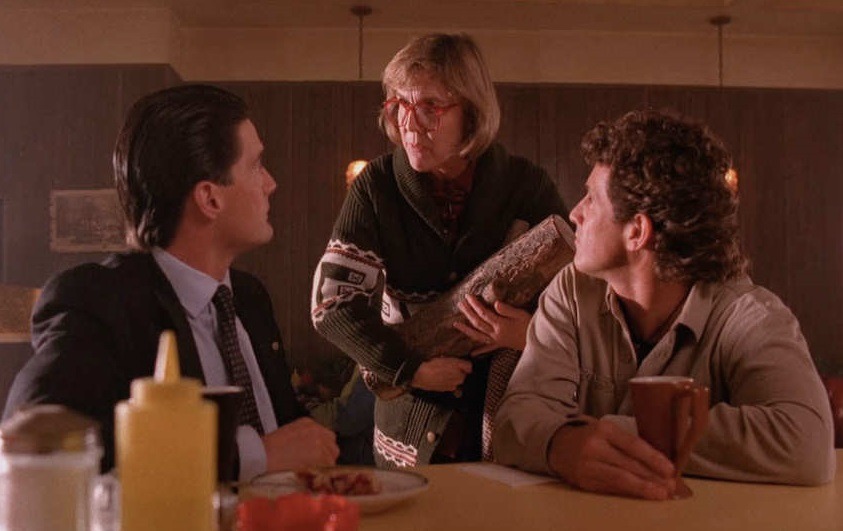
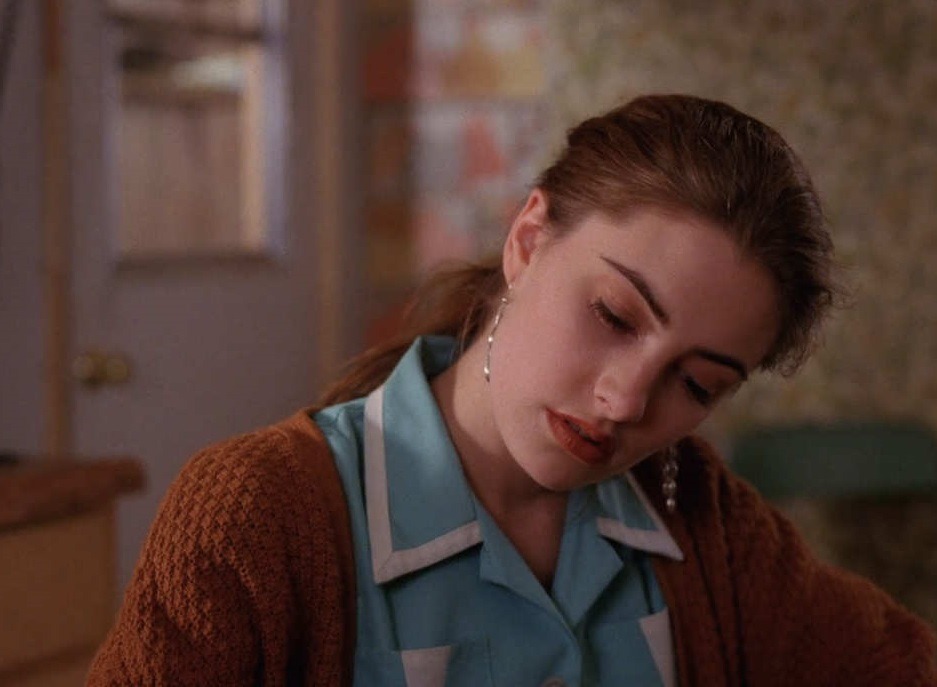
The From Another Place sweater has clear nods to Lucy’s first sweater,
in addition to a few other peak-filled (get it?), high-contrast, chevron-y numbers.
And just like that, Log Lady makes her first appearance in this blog post: setting up the perfect segue to…
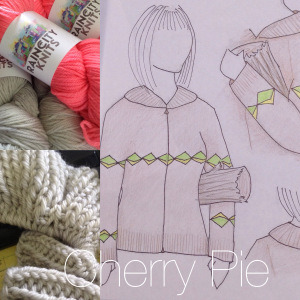
Cherry Pie. Yes, the Cowichan-like jackets the ‘lady wears while ambling around town and eating the iconic Twin Peaks sugary fare are an obvious inspiration for Cherry Pie, the sweater.
They most definitely informed this design as well.
I’m sure these other cozy gems had something to do with it too.
I love that Gregorio is opting to update this classic look of the Cowichan with more modern colours from Rain City Knits.
I CANNOT WAIT.
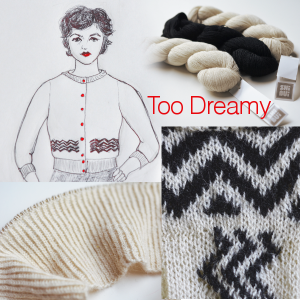
Then there’s Audrey’s cropped, fitted little numbers translating well into the design for a sweater called Too Dreamy.
The sketch even LOOKS like Audrey.
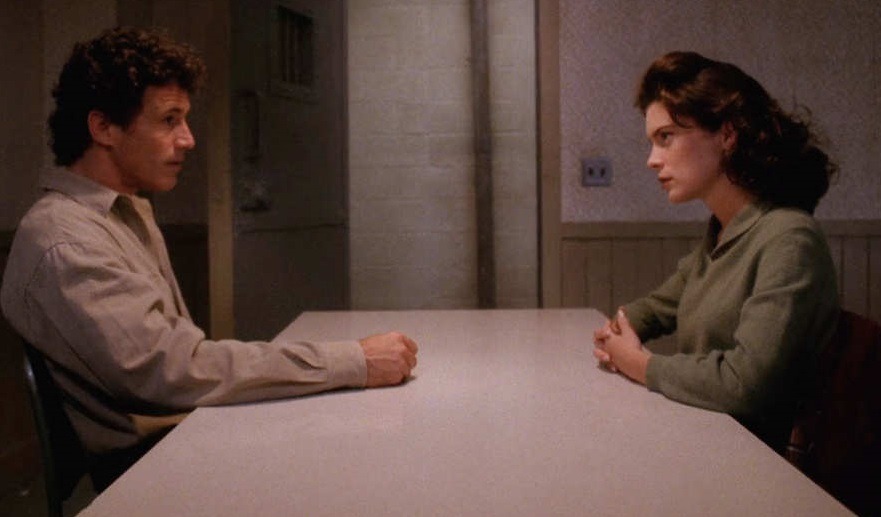
Lastly, we have the cleverly named Lynch Pin sweater.
With its lapel collar, use of see stitch and deep beige colour, it’s also very reminiscent of several sweaters in the show.
I made this hairpiece/fascinator for my friend’s wedding. She was one of my bridesmaids and really liked the ones I made for my wedding, so with her input on styles and colours she liked, I came up with this:
Photo credit: Trinh Truong and Mai-Anh Doan
She looked stunning on her own, but I like that I had a small part to play in the look of her big day 🙂
She asked if I would also make one for her mom as a surprise, though without the veil part. Here is a shot with both. Such a sweet idea.
Supplies:
2″ x 25″ piece of fabric (I used tightly-knit jersey material. Finer or more easily fraying fabrics may require you to double up the material, meaning a 4″ x 25″ piece folded lengthwise)
scrap piece of same fabric about 3″ x 3″
embroidery thread and needle with large enough eye to accommodate
tulle for veil
broad ribbon (at least 2″ wide and ideally not satin) for leaves
artificial stamens (available at most craft stores)
hot glue gun
clear-drying fabric glue
Swarovski or other glue-on crystals (optional)
clear-drying tacky glue (if adding crystals)
alligator-style clip or other hair clip
Step 1:
Take the strip of fabric and fold it in on itself repeatedly without overlapping the folds (see image below). Then hand sew along the two sides as shown using a basting stitch. Knot off at the far right (as in image) and not at left. Take ends of string and gather fabric. You will see the rose shape form. Now tie off end. Arrange rose shape as you would like and use hot glue to tack in place. Poke stamens through. Now hot glue rose shape in place as desired. Let dry.
Step 2:
To create one leaf (you will need to repeat this step for multiple leaves), cut four pieces of ribbon long enough that two pieces side-by-side form a square-ish shape (exactitude is not crucial). Lay two pieces one positioned above the other side-by-side (like the image on the right below) on top of cellophane or other piece of smooth plastic you don’t mind potentially getting glue on (paper will come away with the glue one dried, ruining your leaf). Apply a uniform, thin layer of fabric glue all over the upwards facing sides of both pieces of ribbon. Place the other two pieces on top, side-by-side (like the image on the left below). Press together and let dry. Basically you will have a ribbon and glue “sandwich” with the “spines” (where the ribbons meet) being perpendicular for stability.
One your “sandwich” is dry, you can draw on a leaf shape and cut it out (see image below).
Step 3:
Run fabric glue along raw, cut edge of ribbon leaf to stop fraying. Dab off excess. Let dry.
Step 4:
Position and hot glue leaves and tulle in place on back of rose.
Step 5:
Sew alligator clip to fabric square. Position on back of rose and hot glue on. Trim as needed (rose will obviously not be a perfect square shape).
Step 6:
Use clear tacky glue (apply with a toothpick) to add crystals if desired.
TIP: don’t worry if tulle doesn’t lay exactly right. That’s what steam and hairspray is for 😉
So it’s been a WHILE. I finally got a permanent full time position, moved work locations twice, blah blah.
Also took the time to learn a new crafty skill: sewing!
Danger, Will Robinson. I need another thing to stash like I need a hole in the head.
Behold, my first real sewed thing:
A project bag! I wanted something that could hold a medium-sized project (because I rarely do anything small) and the pattern and notions needed for it. I had been specifically thinking about the beaded shawl I was test knitting for a friend and the amount of stuff I needed to cart around for it: yarn, beads, a crochet hook, and a highlighter with copies of the charts (yeah, I’m old school – I actually mark off rows on a physical copy as I go). I followed the great free tutorial available on Sew Mama Sew.
So my husband and I did this honeymoon do-over (let’s not talk about the first one, which was full of sickness and tropical storms) in August. Yes, that is over two months ago. My life has been crazy busy.
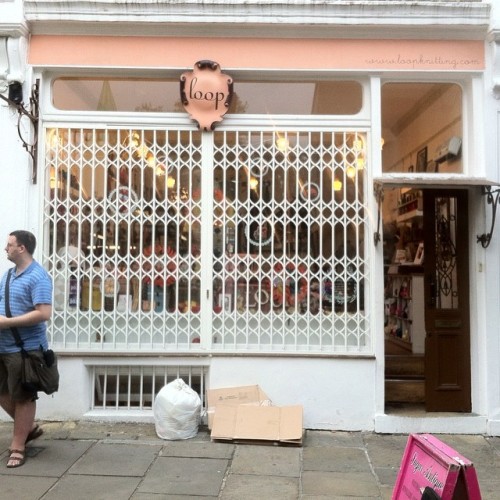
London was fantastic. We did so much in the nine days we were there, but could definitely have spent more time.
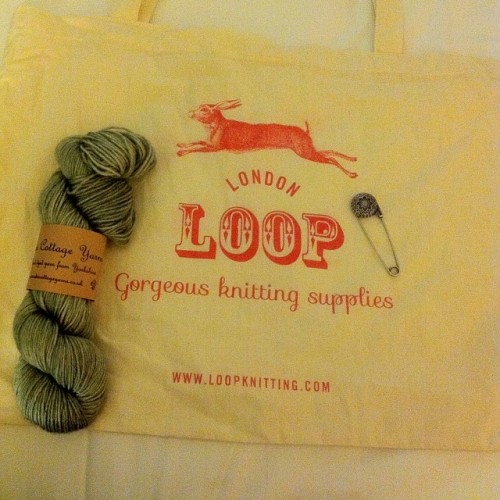
(it’s called Bowland DK by Eden Cottage Yarns. I fell in love with the colour. I also picked up a shawl pin, plus they gave me the bag for free!)
but I also chronicled my fibre-related exploits for y’all. In true librarian fashion.
The sign says:
This door was at Westminster Abbey, if you’re curious.
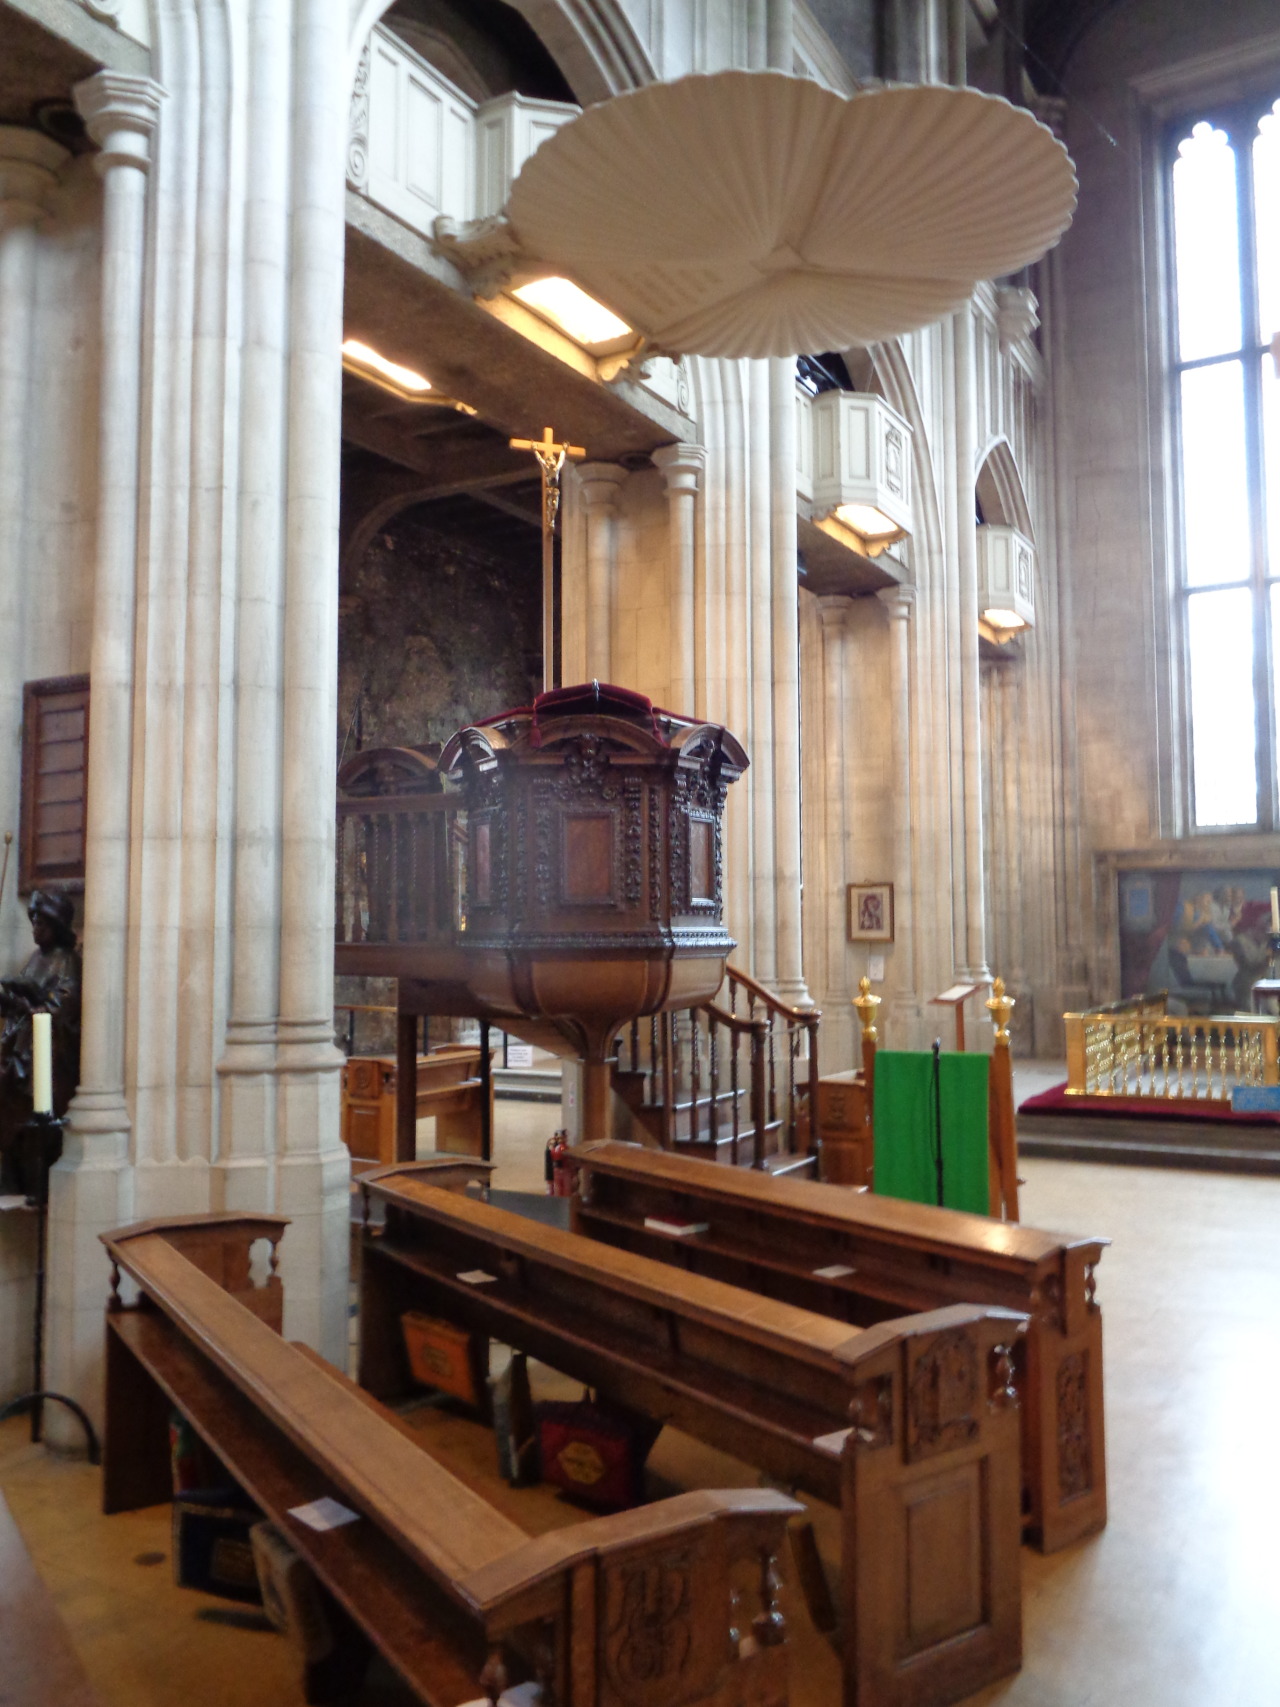
I’ll start with a very cool find at All Hallows-by-the-Tower. Though it’s right by the Tower of London, it’s easy to miss. I only found out about it through an obscure blog post. Even my guide book didn’t mention it, but it’s totally worth a visit. Not just for the fibre-craft related objects I’m going to show you, but it’s a beautiful old church. In fact it’s the oldest in London. It was built on the remains of a Roman house and road, which you can still see in the basement. An added bonus? It’s one of the few churches that lets you take photos inside.
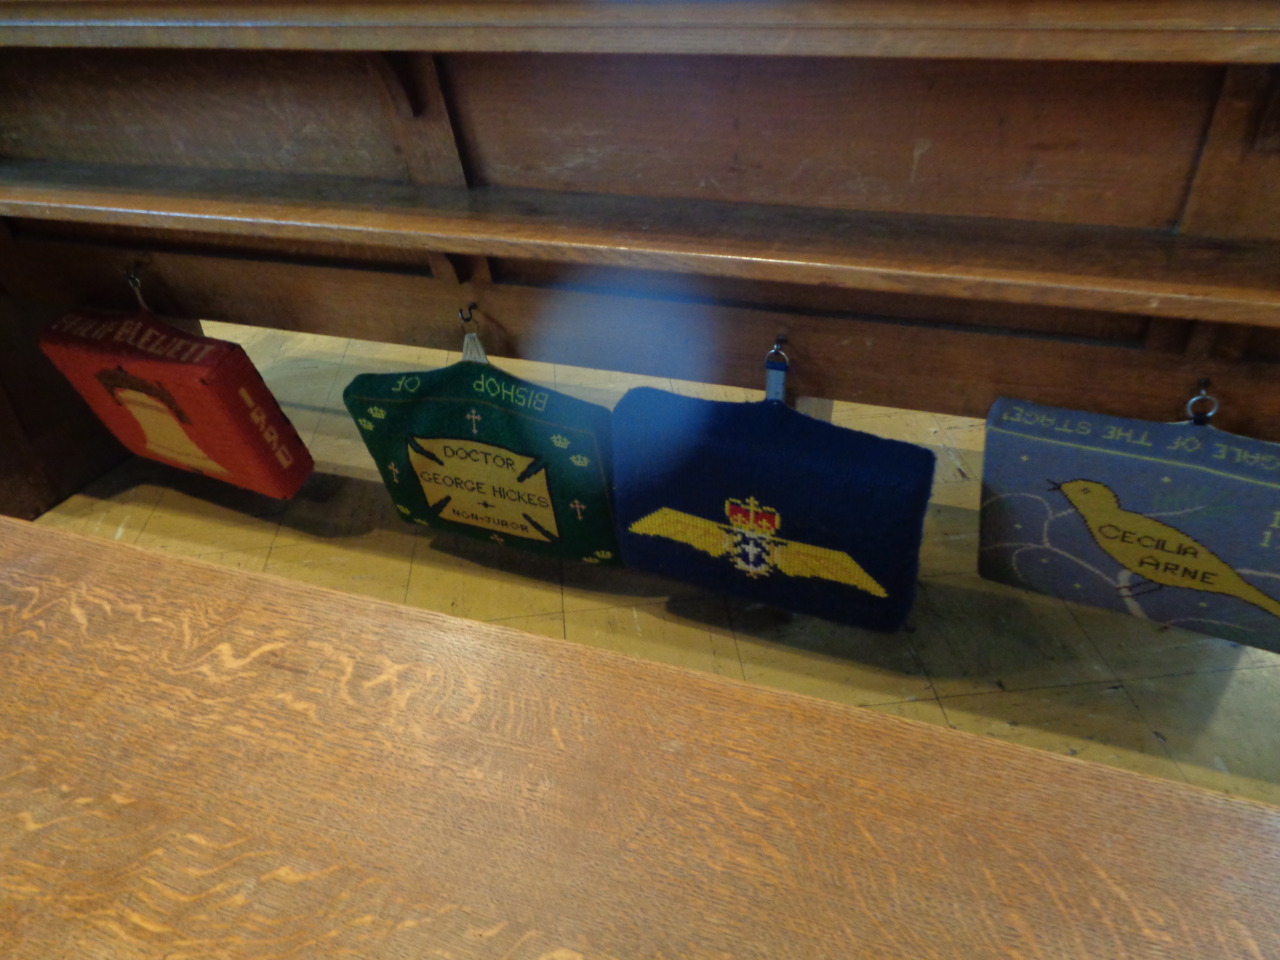
See the weird rectangle-shaped objects hanging below the pews? They are cushions: each handmade by a member of the congregation, going back generations. Here are some close-ups:
I was SO excited to see these very famous ancient Egyptian socks made for wearing with sandals (ignore the “shoes” description. That’s for another item). These socks are often cited as an example of early knitting made using one needle, much like nålbinding.
The works below are woven tapestries from Byzantium.
The above is a woven silk piece depicting a bishop. It dates to 12-1300’s Germany or Italy. The very modern (i.e.: cartoon-like) looking face (complete with what looks like spectacles!) just kills me.
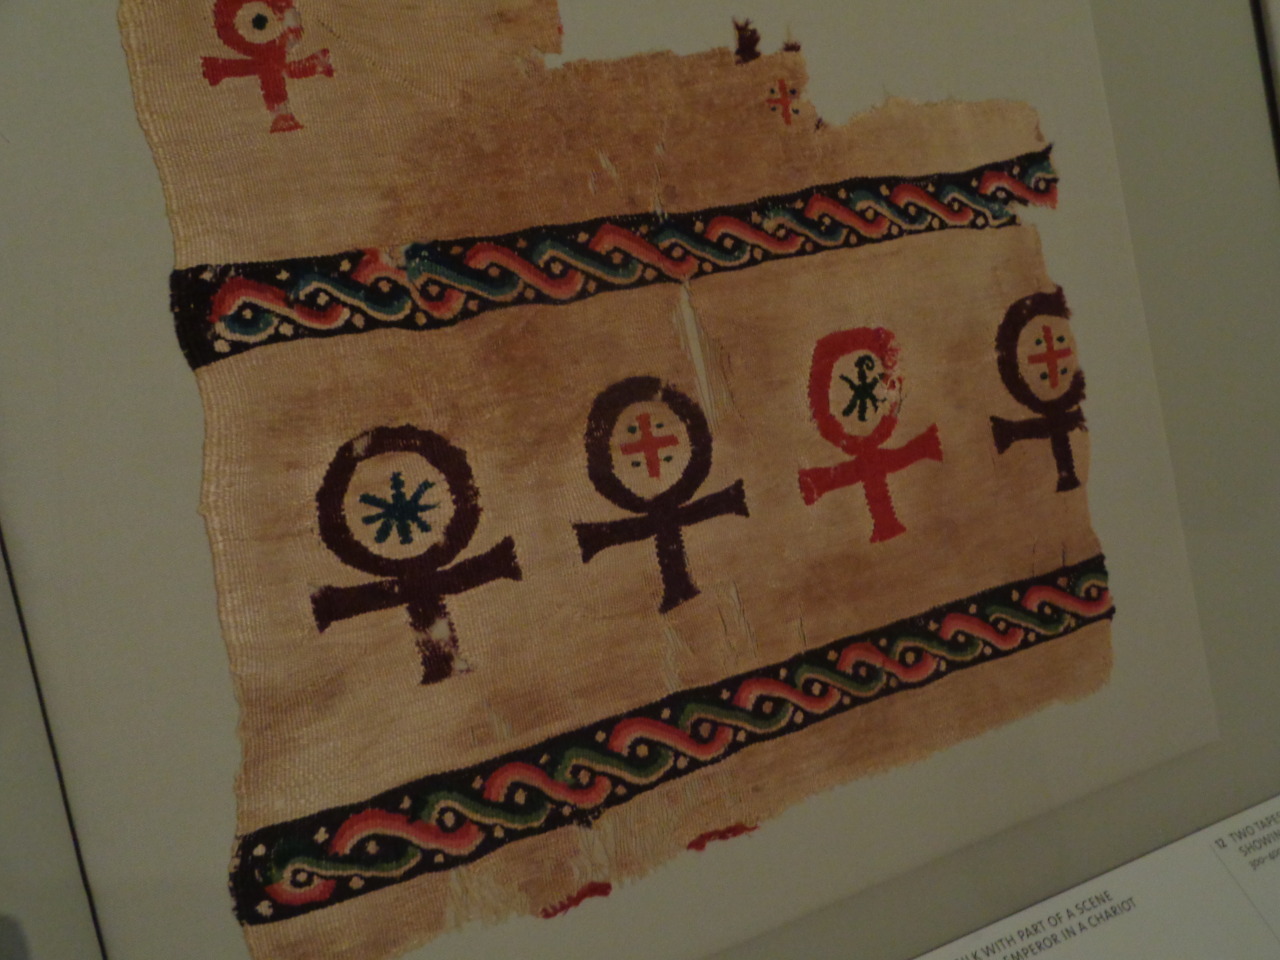
These woven pieces date to early Christianity in Egypt, around 400-600:
Here is a close up of the tapestry on the left. It depicts ankhs – an ancient Egyptian symbol of life that was adopted by the Christian Copts around the 4th century.
Below we have a quilt dating to 1360-1400. Probably made as a wedding gift, it depicts fourteen episodes from the adventures of Tristan. It was hard to take in all the detail on our camera, but you get the idea: lots and lots of stitching BY HAND. So gorgeous. It really has to be seen in person.
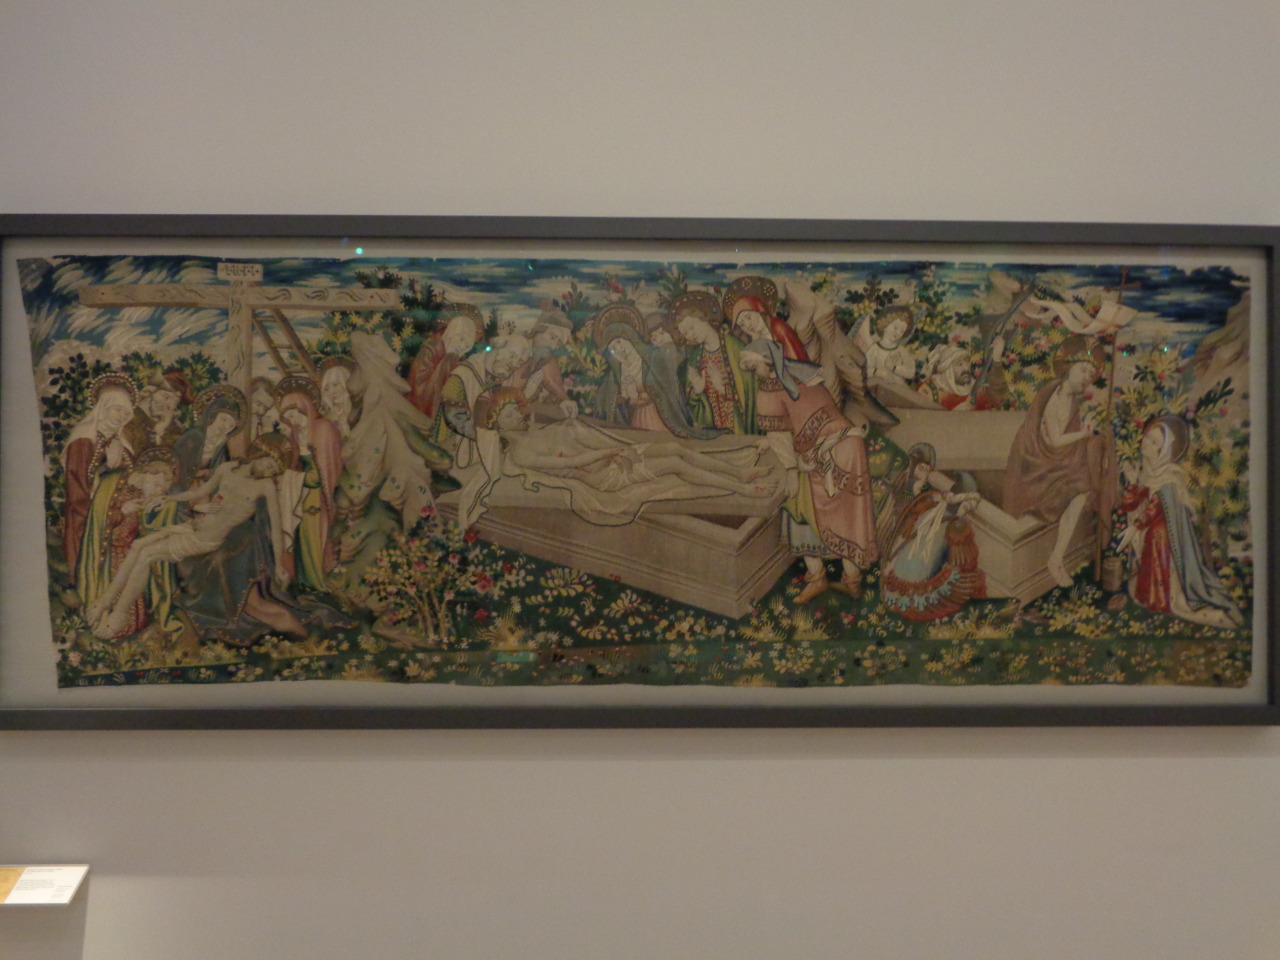
This next one is obviously a passion of the Christ scene. Probably from France around 1400-25. Once again woven BY HAND, folks. Our tour guide told us it took a professional weaver about a month working full time (sunrise to sunset) to make 1 square meter. Remember, most of these were big enough to cover a castle wall!
By the way, if you’re curious why tapestries were so common in the medieval period, here’s an answer: no central heating. Well-to-do homes that could afford tapestries were also typically made of stone. That sh*t gets cold!
We also got to see the famous, and enormous, ‘Boar and Bear Hunt’ woven wool tapestry, probably made in Arras, France or Tournai, Belgium around 1425-30.
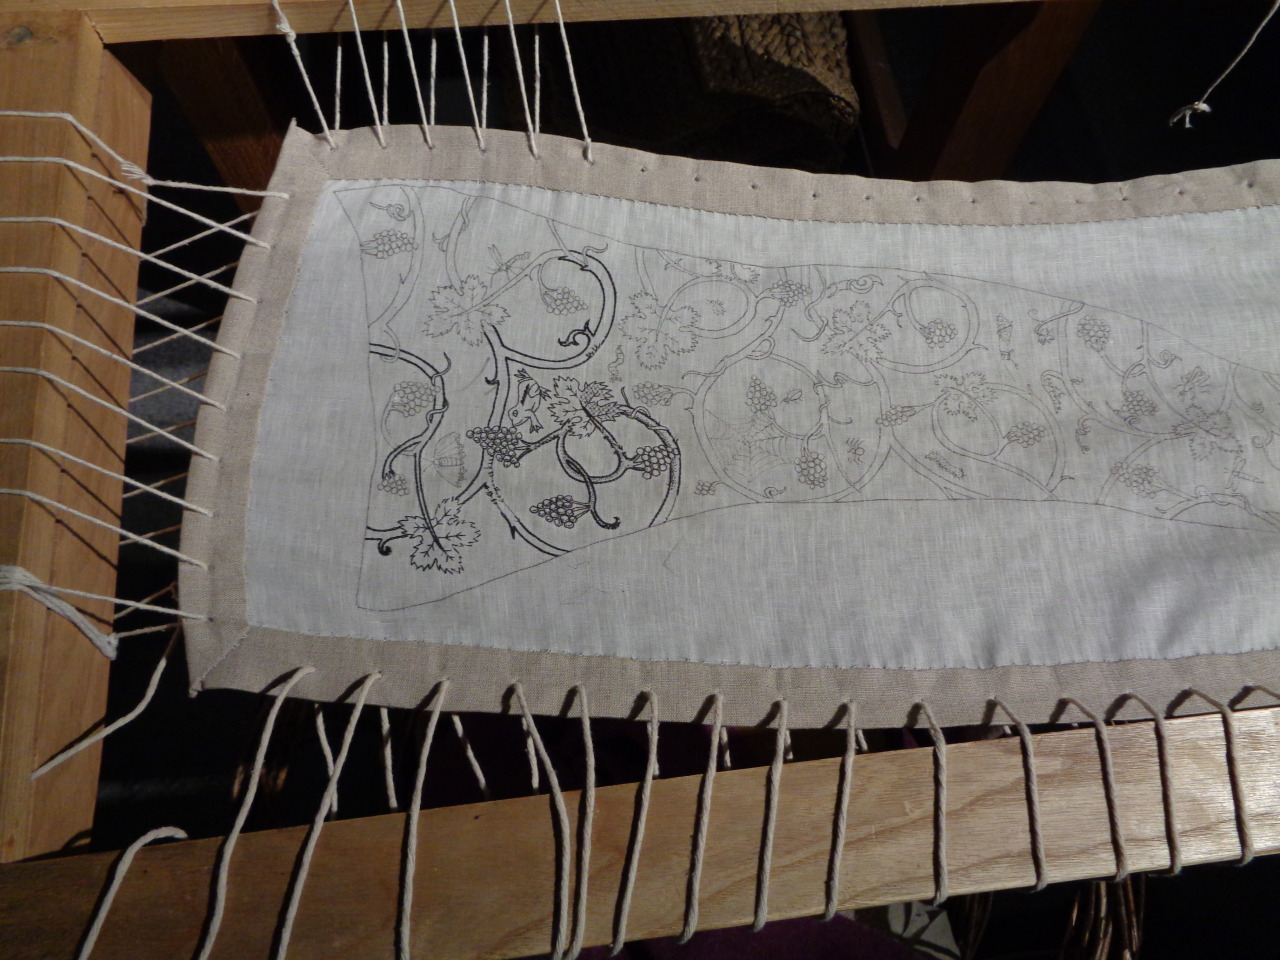
The last fibre arts related stop that we made was at the Globe Theatre. I was super stoked to find a whole reproduction of an Elizabethan costume textile workshop in the museum.
Can you say “heaven”?
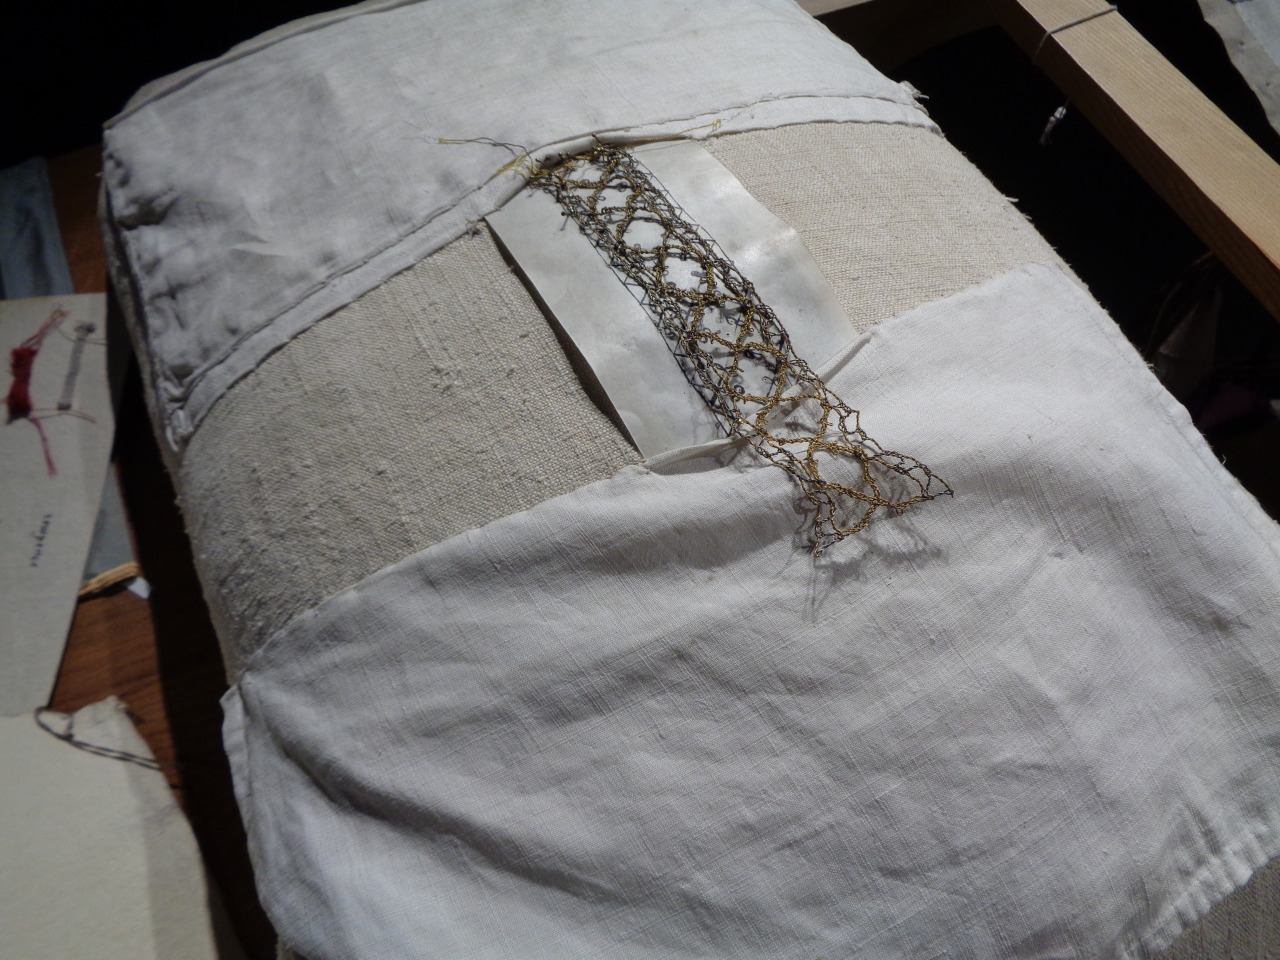
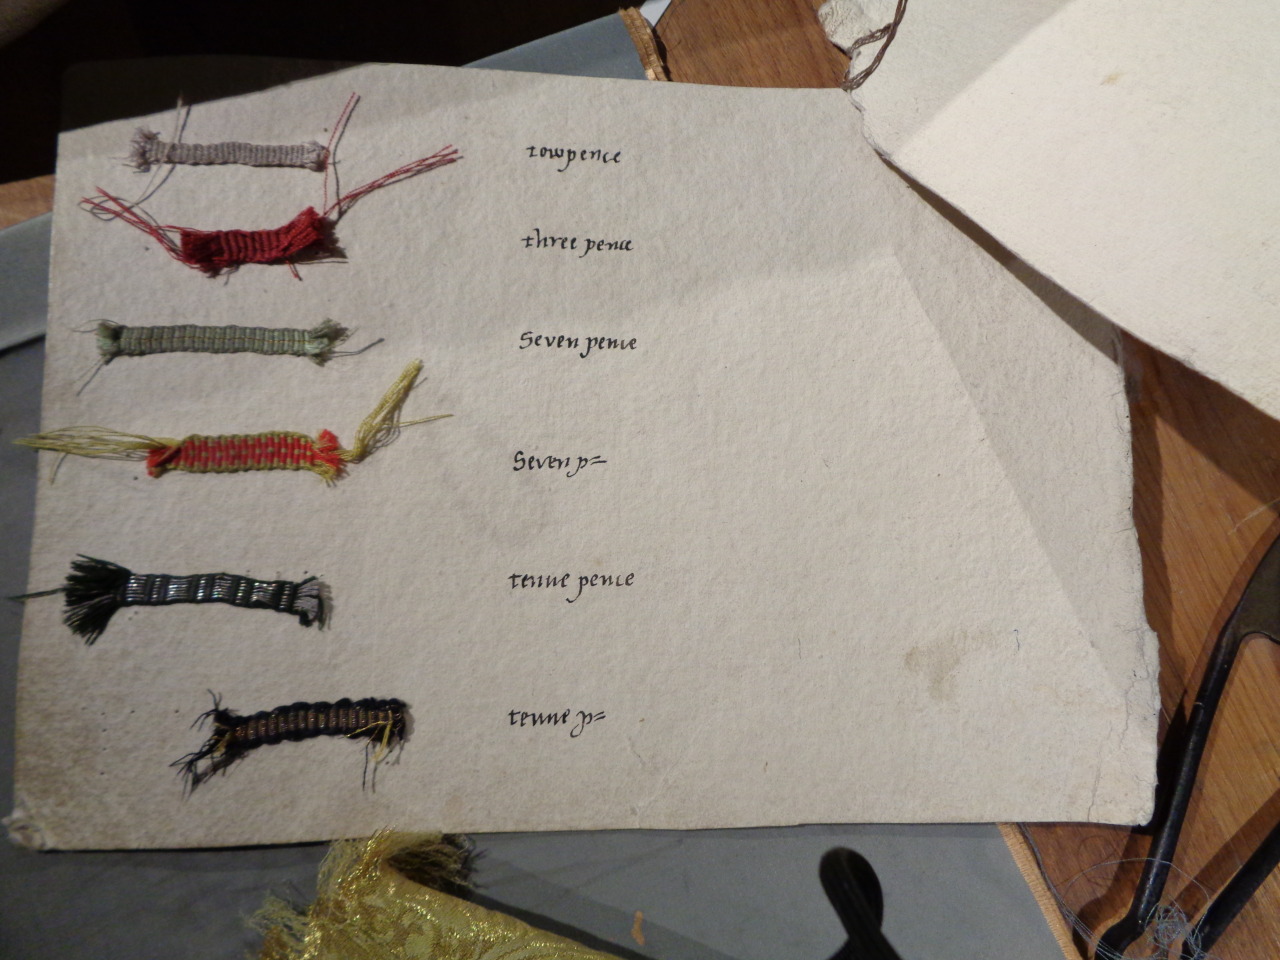
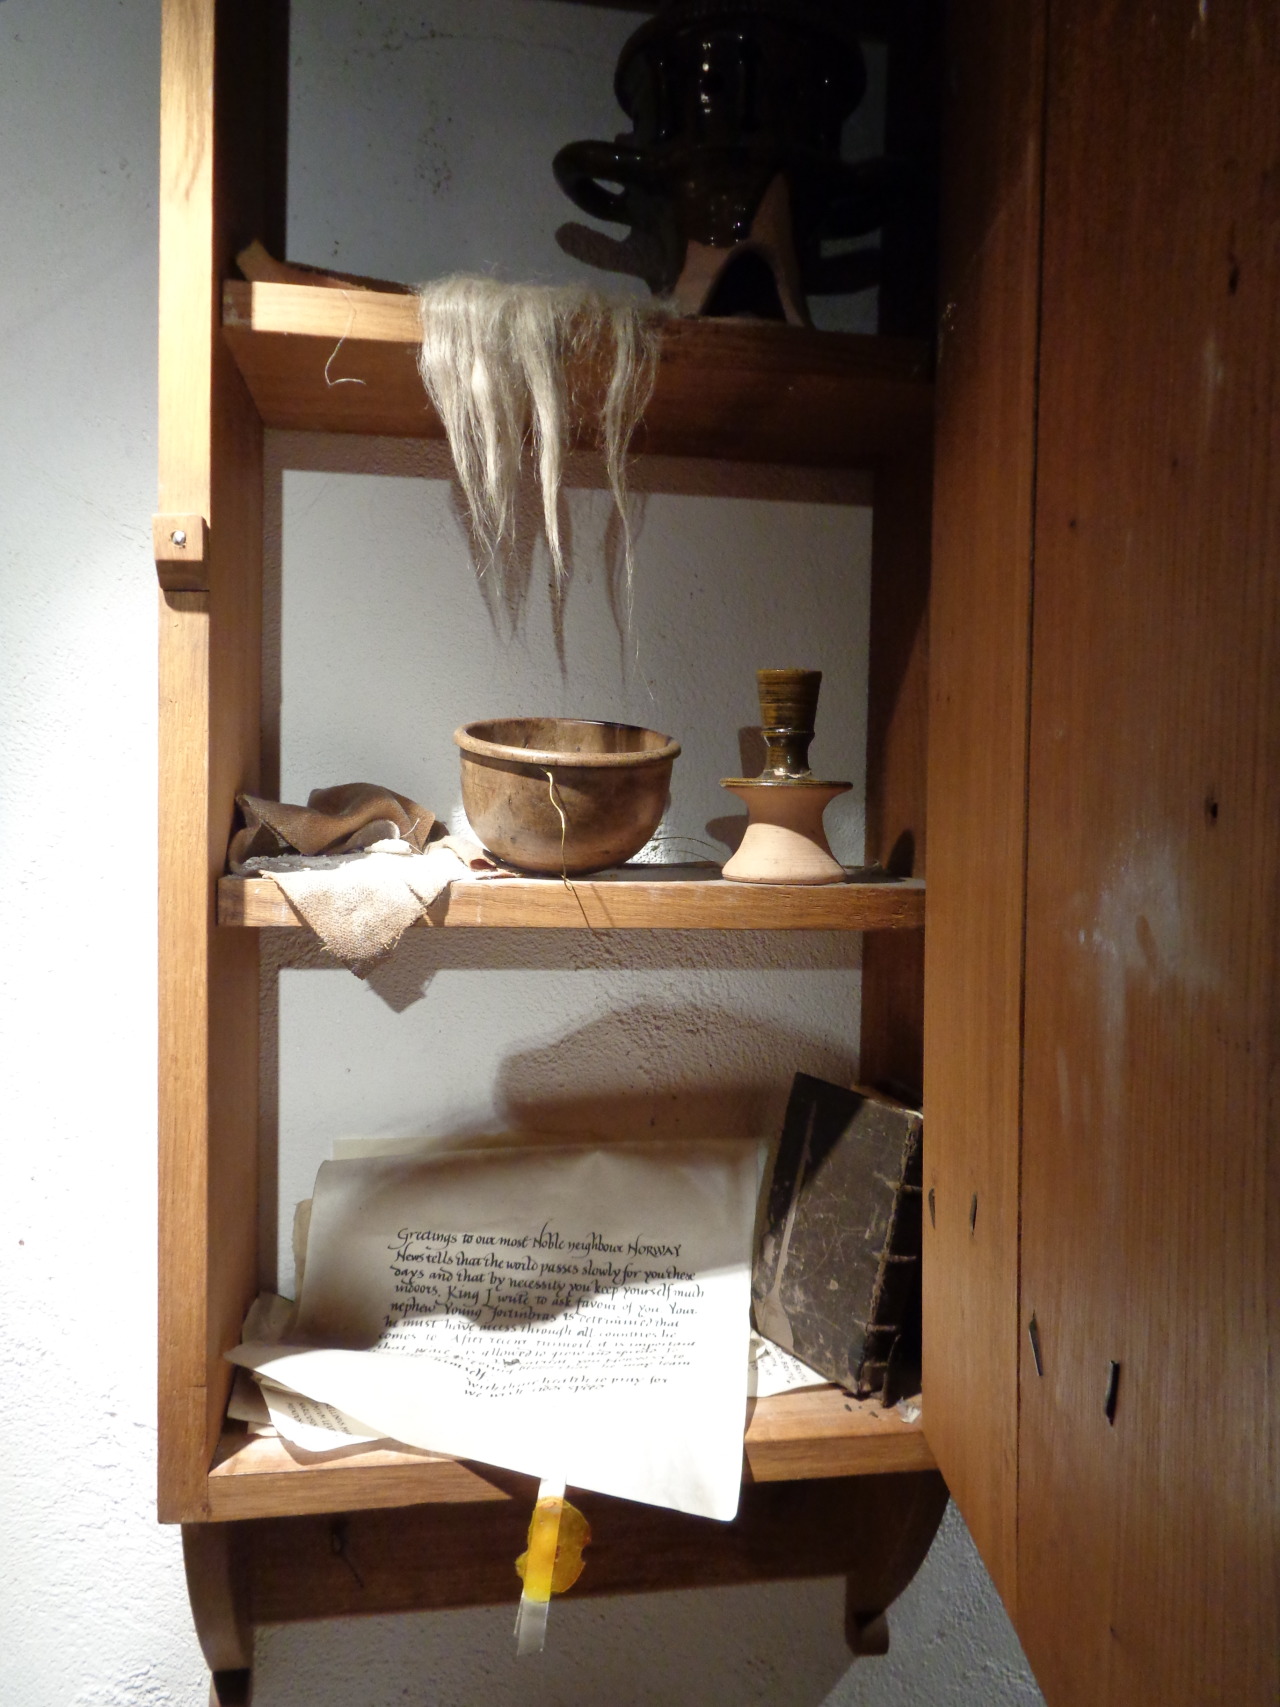
I really doubt that the following close-up images need introduction. Fleece, yarn, dye pots, sewing, pattern drafting, embroidery and lace work, it’s all here.
Pssst: the velvet above is authentic 15th-17th century Spanish and Italian handmade velvet.
And here we have the costume worn by an actress who played Queen Elizabeth at the Globe re-opening.
Check out the handmade lace!
I’ll end with this cool video my husband took of the Swiss Glockenspeil in Leicester Square near Piccadilly Circus/Covent Garden. Not textile related, but still a pretty cool handicraft.
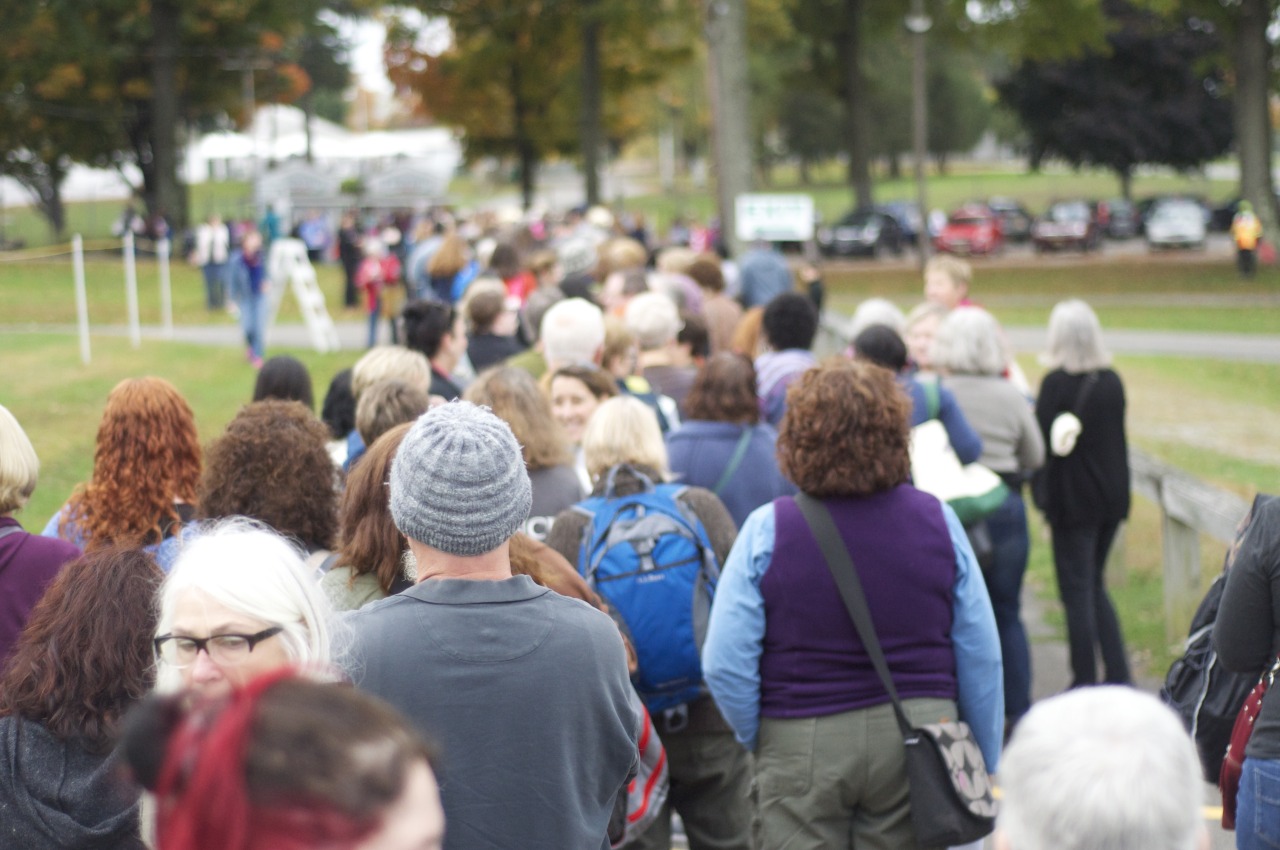
So this was my first year experiencing the yarn mecca that is Rhinebeck. Needless to say it surpassed all expectations.
When we first got there, we had quite a line ahead of us.
and then even more started to assemble behind us…
As uninitiated, we were a little worried we might be in for a long wait. But once the gates were open we sailed in and past some beautiful New England (or close to it anyway) foliage.
Oh, and I forgot to mention that we were sure to wear handknits. Though that probably goes without saying.
The typical country fair staple of judging entries was not to be missed. The fair is so large there are entries from all over. It’s really the cream of the crop here.
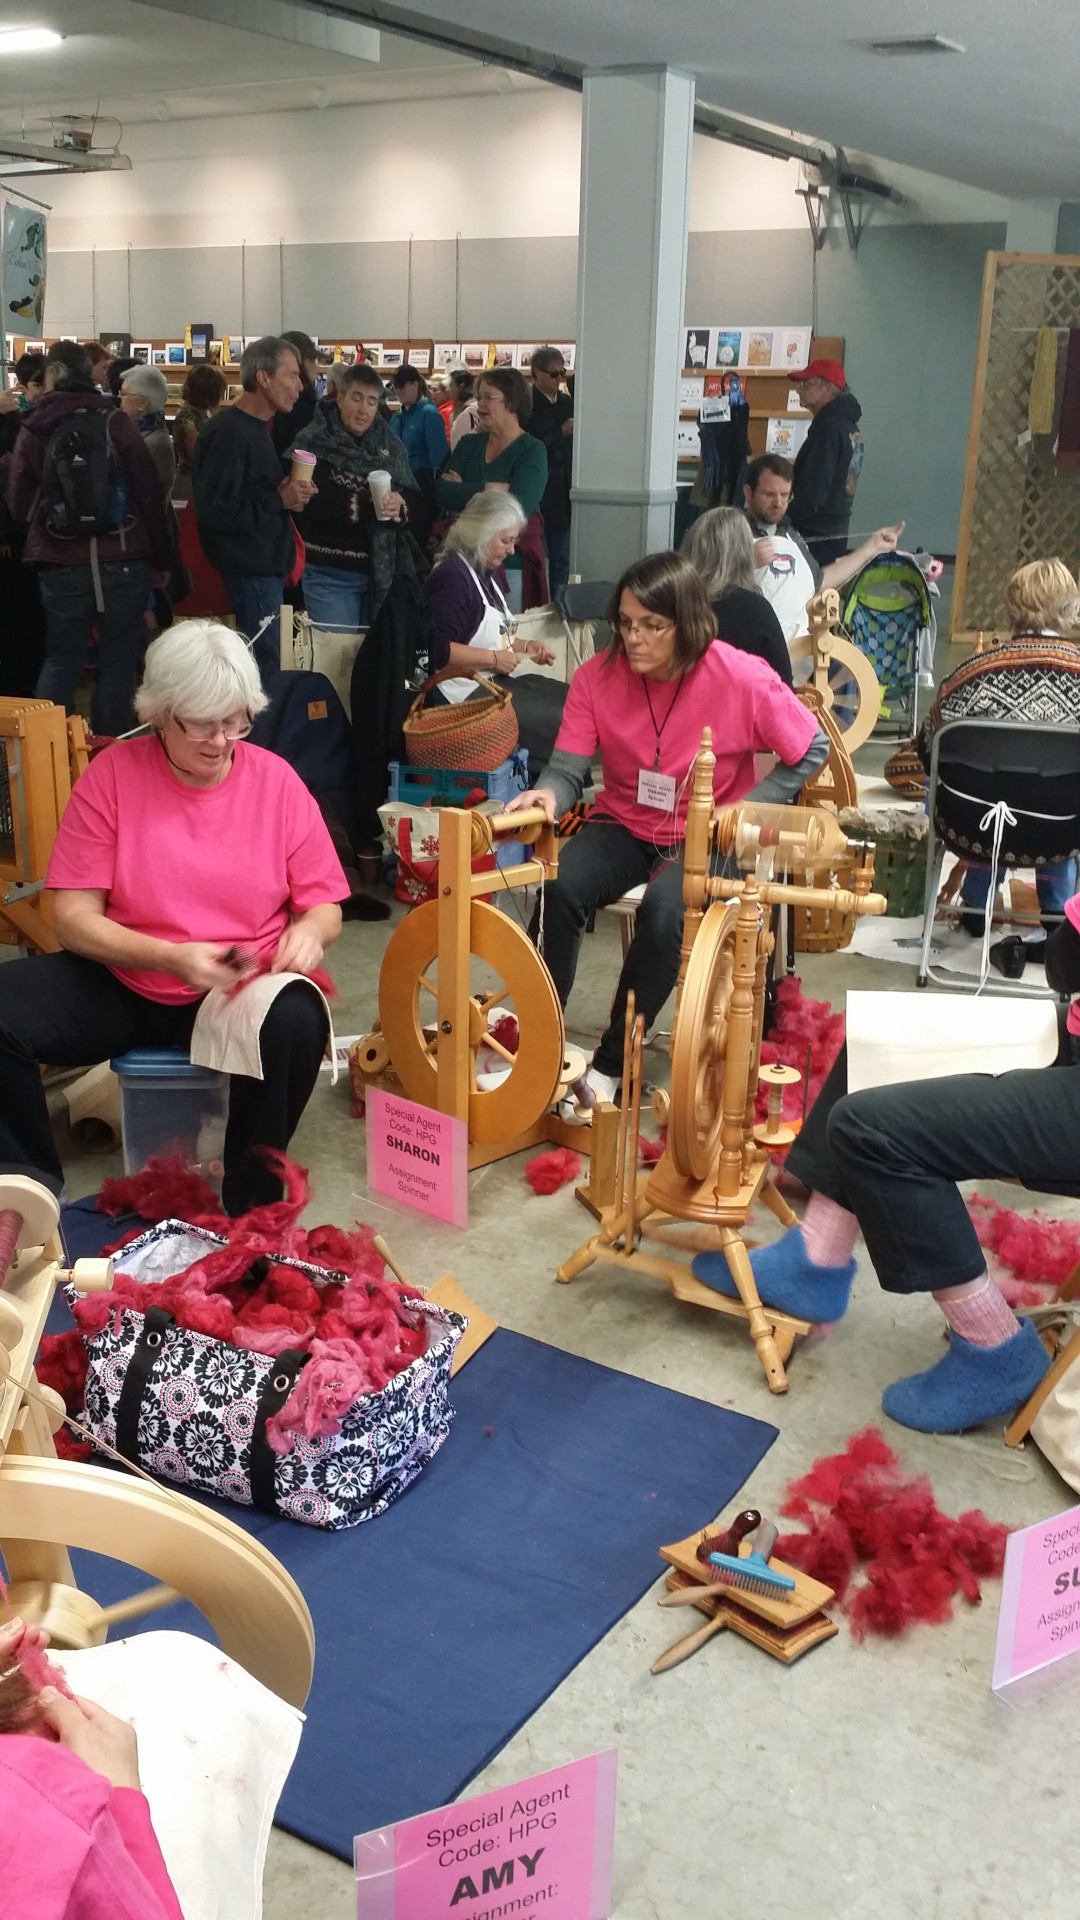
Sheep-to-Shawl!
Look at all that fibre fluff.
Speaking of fluff.
Believe it or not, this is not wool roving, it’s actually delicious delicious maple cotton candy.
Though some members of our group felt compelled to taste actual roving…
You have to be one of us fibre freaks to get it.
Speaking of eats, omg apple cider donuts.
I think the look on my face says it all.
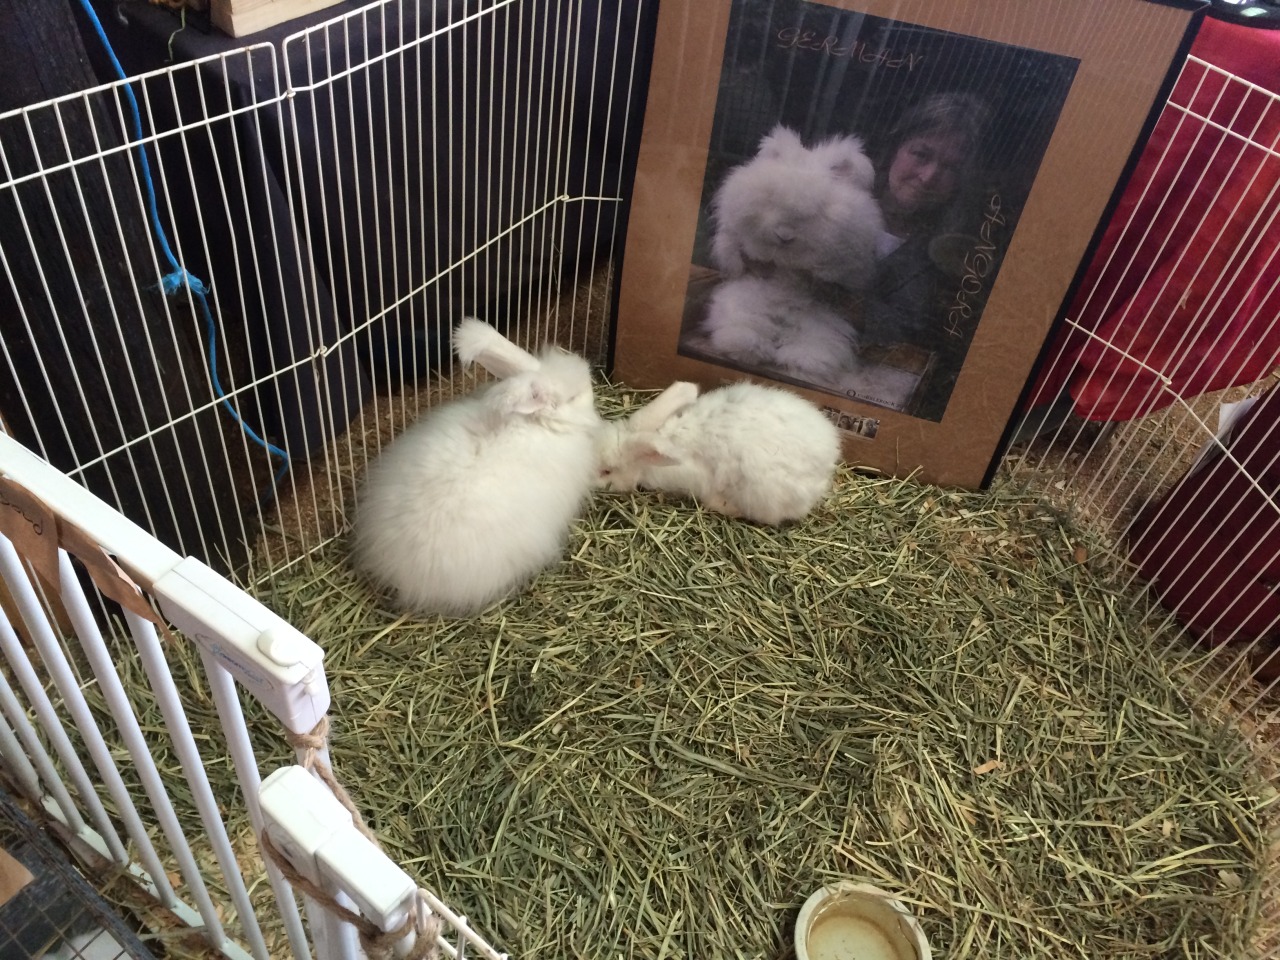
Besides food, there were also animals. Super cute fibre-producing animals (the best kind!).
The underbite kills me.
Llamas are actually quite affectionate. Who knew?
SO FLOOFY!
That right there is a cashmere goat.
And here is a paco vicuña:
Not only are they the cutest of camelids, they make delightful, if expensive, fibre. This skein from Victory Farms shares my name! Alas I didn’t have the budget to actually buy one…
A final animal-related thing I have to share:
Voilà my video of the leaping llama show.
On our last night in town we sampled some local food: AKA The Melting Pot fondue restaurant! We don’t have fondue restaurants in Canada, so we got really excited. The fact that we filled up on chocolate alcoholic drinks before we got our food after a long day of walking around Rhinebeck probably didn’t help…
But I digress…
Finally, here is a summary of the goodies I brought home.
Beautiful hand dyed roving from Briar Rose Fibers and a drop spindle from David Reed Smith. I got the Susan model for fine weights. I highly recommend it.
I also got some angora rabbit for only $10. Second quality, but it will be great for spinning in with other fibres. I also picked up a gorgeous shade of blue silk and merino roving from Pucker Brush Farm. I’ll post a photo soon.