Ingenuity

I haven’t honestly been working on much this summer, besides GOING TO LONDON, ENGLAND. More on that later though, I digress.

Happy Seamstress gave me this lovely hand-spun skein for my birthday.

It got turned into these:

Here is the pattern I used.

I also came up with this cute little pouch for my mom. She has both rheumatoid arthritis and type 1 diabetes. The case they gave her for her needle is a) huge and hard to fit in a purse, b) falling apart and they don’t make it anymore. All of the make up and eyeglass cases she’s tried are too short. Hence I knit her an easy-to-open pouch and using a very tight gauge so that it is a bit of a thicker fabric to protect the somewhat fragile needle and needle toppers.

I cast on with Turkish cast-on 15(30) stitches and then just started knitting in the round. Once it was as deep as it needed to be to fit the needle (plus a little room for closure) I added created eyelet holes through which to thread a drawstring (I made 8, but any even number would work).

The most beautiful thing about Turkish cast on?

NO SEAMS.

Have I gone on about the awesomeness of this cast on before? I feel I may have…

Anywho, here is a great tutorial I found on Turkish cast-on.

The Most Canadian Sweater Ever

So I was shopping at a flea market with the family and my mom pointed this out.

Bless her.

As soon as I saw it I HAD to have it.

It’s Cowichan (see more about Cowichan in my post here) with maple leaf and curling motifs. CURLING.

Did I mention it’s handmade? And IN MY SIZE?!

It’s a bit bulky, but then that’s how cowichans are supposed to fit. At least it’s not a man’s size and I’m swimming in it.

TTC Knitalong 2014

A little late, but I changed jobs last week so I’ve been a bit swamped.

Saturday July 12 was the annual TTC Knitalong. It’s that annual event where Toronto’s knitters (and others! I know people come from far and wide) break off into teams and travel from LYS to LYS via Toronto’s public transit system, the TTC. I was on the best team (sorry, everyone else): Team Lace. We got to visit Passionknit, Creative Yarns, The Purple Purl, and Romni Wools.

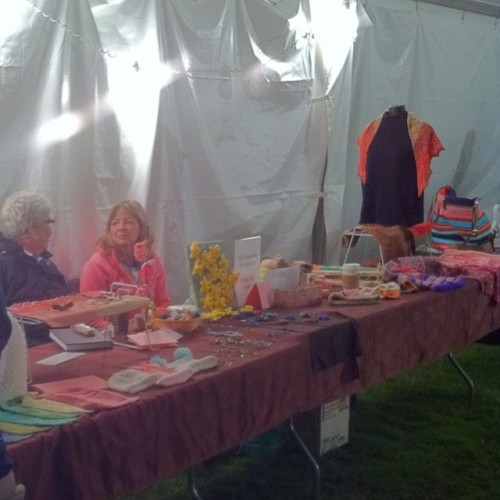
Here is a great photo of us at the Purple Purl that I stole from Lynn.

Jennifer the Happy has another version of the same picture on Instagram and Twitter:

And here is the day’s stash additions of my 3 knitting group friends and myself. Not too shabby.

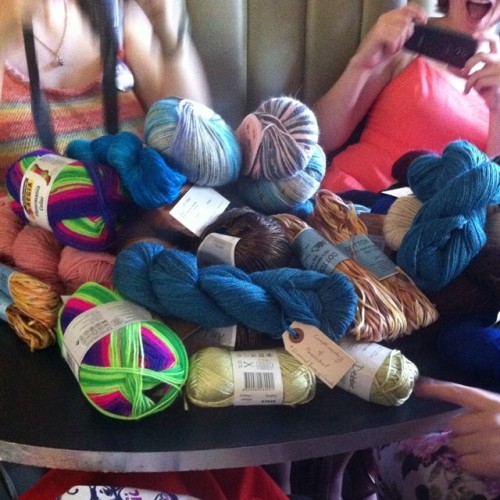
I especially enjoy Alia‘s open mouth of joy and Kara’s fingering of the silk ball in the bottom right corner. I regret none of the innuendos in the preceding sentence.

There are more awesome photos in Lynn’s blog post.
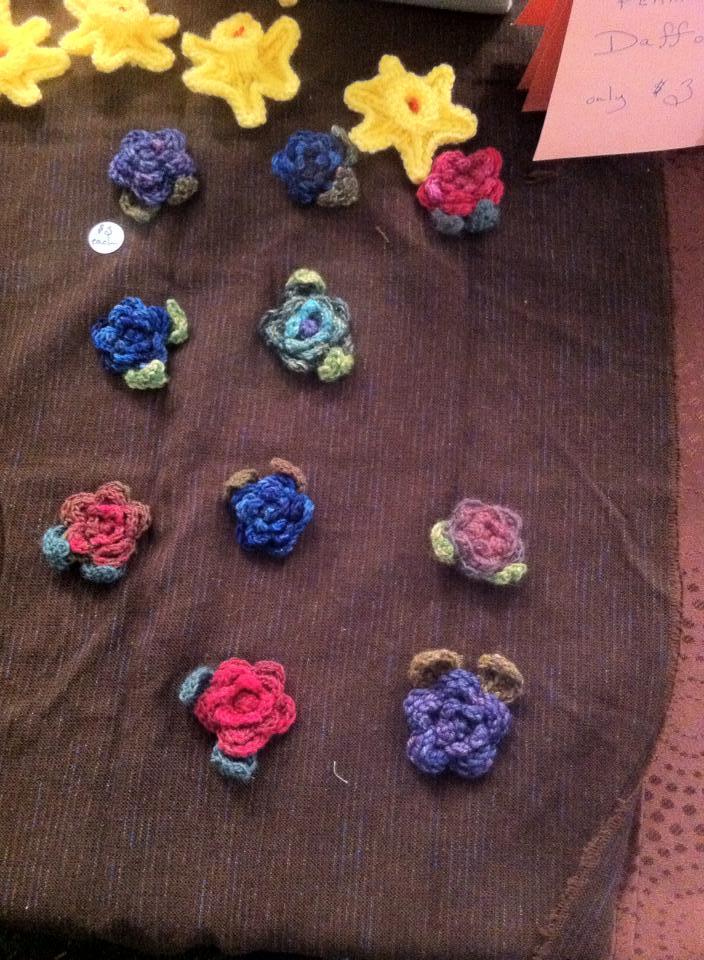
Here’s what I got 😀

(click on the photo for what store and colourway/dye lot info)

100% silk! And Passionknit had 25% off all yarn so… I really couldn’t say no.

NEON SOCK YARN. Need I say more? Lynn, Kara, and I decided we had to have it as soon as we saw it at Creative Yarns. Other team members judged us, but I don’t care. At one of our knit nights we plan on all showing up with neon socks-in-progress. It’s going to be epic.

And that is all the yarn I bought. I KNOW, right? But Lord knows I have enough stash at the moment.

BUT, Passionknit was lovely enough to give out free Mirasol lace weight. Yes, you read that right.

Other awesome freebies included this gorgeous wooden crochet hook and some stitch markers from the Purple Purl,


and this cool button from Wool Gathering (then again, I love buttons) sporting a sentiment I happen to share,


as well as a bag, back-issue magazine, and yarn from Romni Wools. How incredibly generous LYSes can be.

And here is this year’s official button and bag, both of which are probably my favourite of the three years I’ve been doing this.

I also won a prize! Which floored me, because I never win anything. I won a copy of French Girl Knits by Kristeen Griffin-Grimes and a skein of Diamond Luxury Collection Fine Merino Superwash Lace from Knitty and Diamond, respectively.

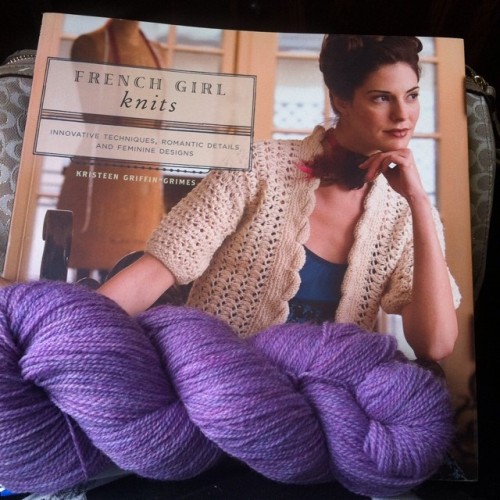
And I like almost every pattern in French Girl Knits. Bonus! I mean, how could you not. Look at this gorgeousness:

I also bought two books. This is likely not a surprise to anyone who reads this blog…

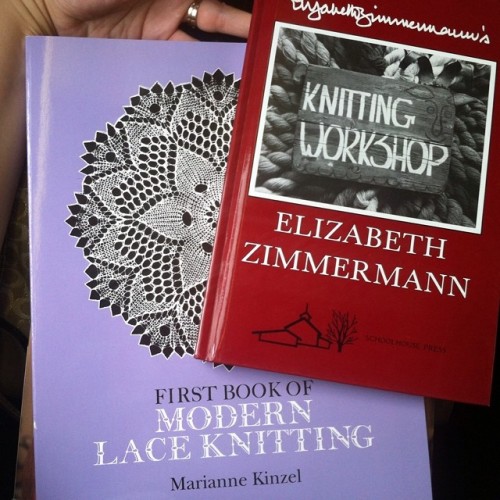
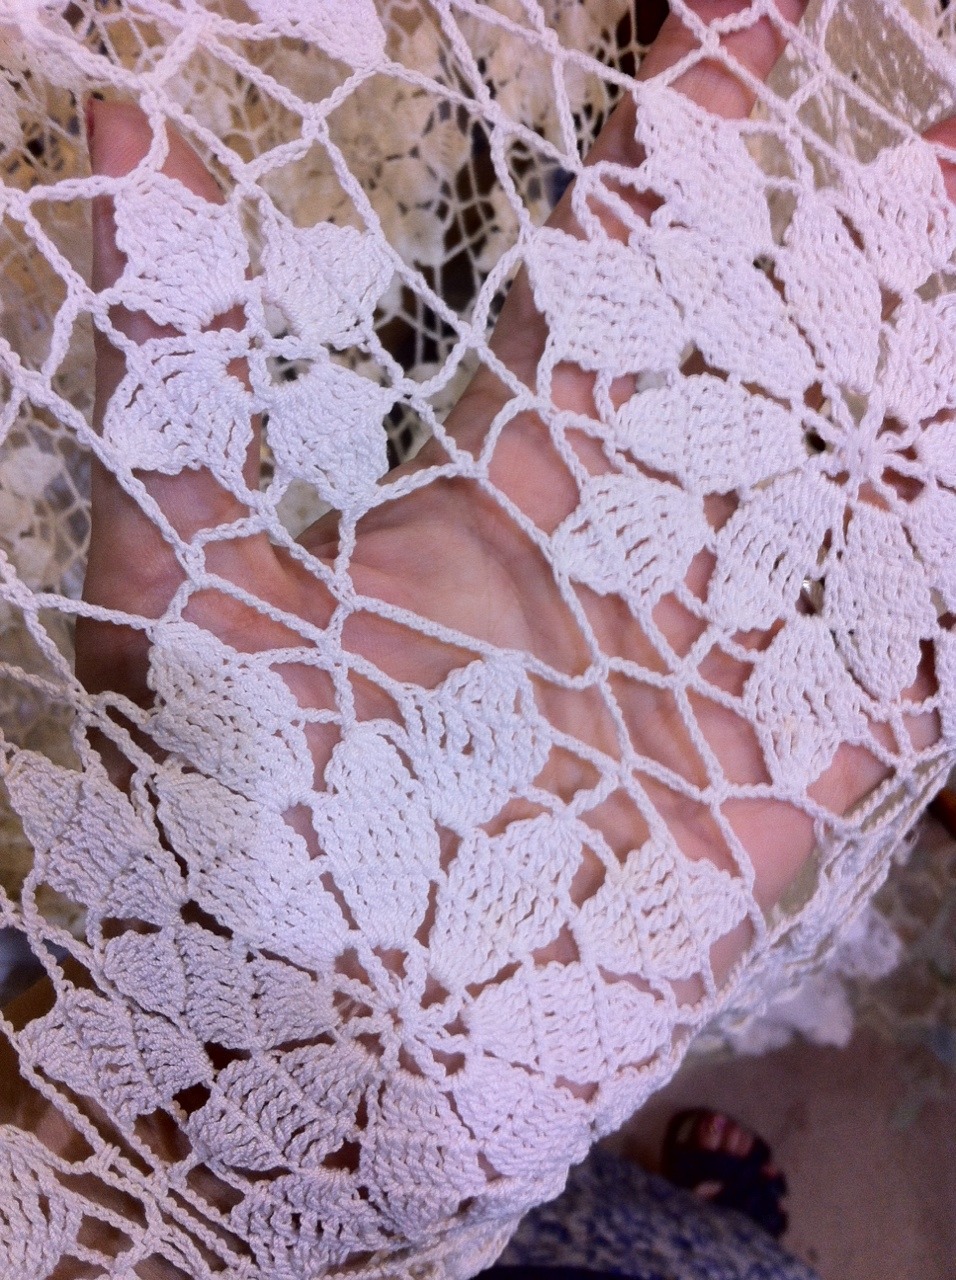
Elizabeth Zimmermann’s Knitting Workshop is a classic. The late Mrs. Zimmermann was a master knitter from a European generation who memorized “recipes” for patterns, rather than rely on following written patterns verbatim. Take this page from her instructions for The Original Shetland Shawl as an example:

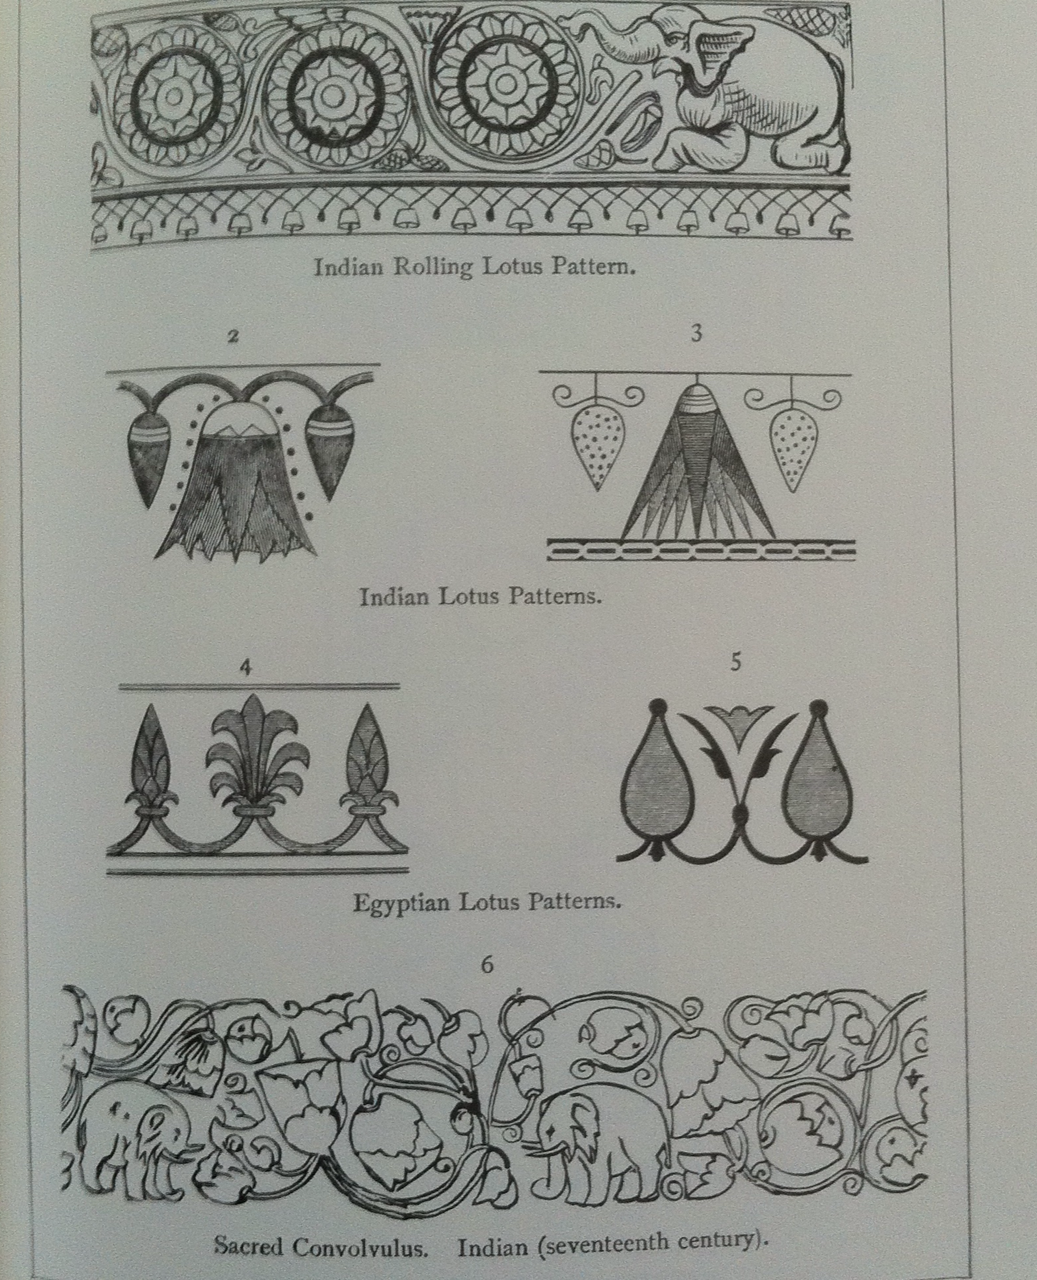
Marianne Kinzel’s First Book of Modern Lace Knitting is in the same vein, albeit the lace work featured in it is so detailed, some instructions are needed. I would like to try this doozy. Wish me luck.

Of course I will be using it as a shawl rather than a dinner cloth 😉 I’ll be damned if I let anyone eat off of this sucker.

Can’t wait till next year’s TTC Knitalong. It will be the 10th anniversary!

Old stuff

I loves it.

I nerded out pretty hardcore when I saw that the decor theme at this restaurant was all vintage knitting and sewing stuff.

And at a used bookstore I recently acquired these:


Early American Weaving and Dyeing by J. & R. Bronson was first published in 1817. It discusses how to weave 35 designs and includes 41 dyeing recipes and tips. There is detailed coverage of wool processing, calculating thread, carding and spinning, loom operation, more.

Here are some excerpts:

Needlework as Art by Lady M. Alford is rather self explanatory. It explores the history of needlearts around the world.

Excerpts:

Remember, all of this would have been done by HAND. It blows the mind. This is why I love textiles: it’s history you can hold and use.

Another cool find recently has been a flea market with a large collection of antique crochet. Did you know that all crochet is done by hand? Machines can’t duplicate it like they can with knitting. You can have faux lace made on a machine, but it is just fibres crimped and pressed together cheaply, or in some places acrylic/plastic (shudder), but it will never be true crochet like these beauties:


I included the cake lifter in that last shot because it’s petit point themed. How awesome is that.

Relay Recap

Friday night into Saturday morning was the Canadian Cancer Society’s Toronto-Central Relay for Life in support of Sunnybrook Hospital’s Odette Cancer Centre.

Our team, Downtown Knit Collective, raised almost $13,000!! I myself raised my all-time best of $560! Thanks to those of you who saw my many requests and blog post and donated 😀

In a typical relay you walk around the track all night from 7pm to 7am. Now, 12 hours is a LOT, so that’s why you register in teams, so that you can spell each other off, hence “relay.” Our team, however, has special dispensation to knit all night instead.

Though the reason for the event is serious and sobering, which is at times brought home by things like the Luminary ceremony, ultimately it is a fun night of camaraderie and hope. That and lots of sugar and coffee to help you stay awake.


There were also activities you could do on your breaks, including SUMO WRESTLING (yes, again. I don’t care it’s super fun) and these gigantic inflatable bouncy pony things that became the best thing ever at 3am.

CanadianChia even cut off her hair to donate to Locks of Love. And instead of just sending donors on their way, volunteer professional stylists styled your new cropped ‘do for free!


New this year was a Night Market. Naturally, we knitters had some wares for sale.

Flowers by the lovely Ilana

The cuteness of this hat just kills me.

Relay for Life 2014

Once again I’m participating in the Relay for Life on the Downtown Knit Collective‘s team.

We’re currently in third place for top fundraising team!!! (PS: if you feel like helping us get to number one, and donating to a very worthy cause you can donate by clicking here)

I’ve participated in the past (see here), but this year is particularly meaningful to me because my grandmother is fighting her battle with cancer. The same grandmother who taught me how to knit ❤

This year also marks 10 years of the Downtown Knit Collective relay team. To celebrate we will be hosting a Fibre Arts Activity Area at our Team Site at the Relay. As you may remember, in order to help the relayers stay up all night there are various activity areas. In 2012 canadianchia and I got to wrestle in sumo suits (pics here). We are thinking of using our activity area to teach other relayers things like arm knitting and finger knitting, making a pompom, corking/spooling, knitting on a giant scarf, crochet, making a flower, demos of spinning on a wheel and needle felting.

There is also going to be a marketplace this year and we have been offered a table. We will be selling small items in the range of about $1 to $5, such as hand-knitted cancer ribbons.

I’m SO excited!!!

Lonely Tree Shawl

Done!

Here is the pattern. I wanted to make this usable in the summer, so I used cotton yarn. Just good ol’ Sugar n’ Cream in the batik ombre colourway. I’m pleasantly surprised at how it turned out.

Inked

So I got this yesterday.

I am very, very happy. It’s something I’ve wanted for a long while. My knitting and cat obsessions are likely obvious if you read this blog, but what might not be is that I learned to knit from my grandma and come from a line of crafty women. Hence, this design has multiple meanings for me.

Putting it on my wrist was a bit of a big decision, but I’m ultimately very happy. My first tattoo isn’t so visible, and I’ve always wished I could show it off more. So, I figured why not take the plunge with this second one?

Another thing that I’m excited about with this tattoo? My husband drew it 🙂

Of course, small tweaks needed to be done by the tattoo artist. He added the detail on the yarn for example, which I LOVE. It was really cool to bring the hubby and let the two artists figure out the final product. I of course had input, but my art skills are so terrible I was happy to defer to them.

PS: the artist is Peter Belej at TCB Tattoos. HIGHLY recommended.

Maker Bracelets

1) Paracord Emergency Bracelets

I’ve recently fallen in love with paracord. It’s strong (it was designed to be parachute cord) yet not overly thick and comes in bright colours. You can use it to make bracelets out of 8+ feet of cord. So, if you’re ever in an emergency situation just unravel it and you have a lifeline, tow line, or whatever it is you need. These are called “emergency paracord bracelets” and there are lots of tutorials on the Internet on how to make one.

So, when I was trying to think up maker programs that can be done inexpensively in only 45 minutes for our maker club at work, I naturally got to thinking about paracord.

The kids ended up all making one to take home, but in order to make it “maker” I started with an exercise to show them how paracord works and how different knots should be used for different situations. The tutorial that follows is also available on Instructables.

Materials:

  • paracord rope
  • thicker rope (does not matter what kind, by the more slippery the material the better)
  • a bucket with weights in it (we just used paint cans for weights)
  • large print-outs of how to make different knots: buntline hitch, half hitch, square knot, sheet bend, zeppelin bend

1) Have one approximately 2 ft long piece of each type of rope per group of kids (we had them into teams of two, but whatever works)

2) Talk a little bit about what paracord is and give some examples of situations where one would need such a strong rope and need to know which knots to use (i.e.: towing objects, creating a life line to save someone from drowning, etc.)

3) Have the teams decide amongst themselves which knot is best to tie the two pieces of rope together: square knot (not good for anything with weight to it) vs. sheet bend (ropes of unequal size, therefore the right answer) vs. zeppelin bend (two ropes of same size)

4) Have the teams decide amongst themselves which knot is best for tying to the bucket: buntline hitch (best) vs. half hitch (too weak)

5) Let the teams take turns tying one end of their rope to the bucket and hoisting it up by the other end. There should be fairly obvious strain and slippage of the knots if the wrong knot(s) have been used, which you can point out. The team that got the most right wins. In lieu of actual prizes, which we are getting low on, we just let the winning team get first choice of which colour of paracord they wanted to make their bracelet.

I was pleasantly surprised with how well this turned out as a program. The kids got really into it, debating which knot they thought would work best, and coming up with testing methods on their own, such as tug-of-war to test the knot’s strength. Definitely maker!


2) Bottle Cap Bracelets

In a few weeks from now, we will be having another craft event. It doesn’t have to be maker per see, since the theme is just “art, community, and history,” but I think the program I came up with has some elements of it all the same. We’ll be making personalized bracelets from bottle caps. Participants will be able to get creative and find images that they like or resonate with using donated magazines from a variety of cultures, religions, and interests. After all, diversity and multiculturalism are big part of the community my library is located in.

All I did was take a bottle cap, cut out an image to fit inside and then used mod podge to glue it to the bottom and seal it in. Not surprisingly, I used a scene with sheep as my image for the sample 😛

I then used the metal punch from my jewellery making kit (available for under $20 at most beading or craft stores if you don’t already have one) to poke holes in the side for split or jump rings and simply used rainbow loom elastics to make the bracelet part. You could also use hemp or leather or just link multiple bottle caps together if you have enough of them.

Tools of the trade

I recently was given some coupons for some good deals, so naturally I decided to get some tools I’ve had my eye on for a bit. Regular household items like a steamer and a kitchen scale…


Except that I have ulterior plans.

Sure, they will come in handy for cleaning pet stains, steaming wrinkles out of clothes (I HATE ironing, so this is good) and measuring recipe ingredients. However their main purpose will be yarn related. The steamer will help me block with greater ease, and the scale will help me figure out how many grams I have of a particular yarn. There is nothing more annoying than having to guesstimate because you want to cast on for a project that needs 120 grams and you have the perfect yarn for it but you no longer have the ball band and/or used only part of the skein in an earlier project and so have absolutely no idea how many grams you have left.